Our Mission

To live a self-sufficient and organic lifestyle for the next half century. With the Grace of God and the power of prayer, we will succeed. Nothing is impossible with His help. It wouldn't be us without laughter and joy at the Cockeyed Homestead.

Find out more about our homestead on these pages

Wednesday, October 30, 2019

Cooking with Chef Jo: Making My Fruitcakes

For decades now, I always do my baking of my fruitcakes on Halloween. It takes a month and a half months worth of basting and turning weekly to have it come out moist and tasty. I use two separate basting liquids. One is alcohol free and the other is for those who enjoy the alcoholic kick. My next older sister and I are former alcoholics so we refrain. So three of these cakes get the simple syrup cakes. Notice the difference in the count? We also have a friend who receives a cake who refrains from alcohol.

Jo's Fruitcake
9 1-lb loaves or 18 mini loaf pans (I do a combination of pans)

Slice of finished fruitcake
What you'll need
1 cup dehydrated grapes, or golden raisins, chopped
1-1/2 cups shortening
2-1/4 cups sugar
8 eggs
1 teaspoon vanilla extract
4 1/2 cup all-purpose flour
1 teaspoon cream of tartar
                                                             1 teaspoon salt
                                                             1/2 teaspoon baking soda
                                                             1/2 cup milk, soured with 1 tsp lemon juice
                                                             2-1/2 cup chopped pecans, toasted
                                                             1/3 cups diced dehydrated pineapple 
                                                             1/3 cup chopped maraschino cherries
                                                             1/3 cup chopped dehydrated peaches
                                                             1/3 cup chopped dehydrated figs

Simple Sugar Syrup
2 cup of water
1 cup sugar

Alcoholic Sugar Syrup
1 cup water
1/2 cup good rum like Jameson's or Bacardi
1 cup sugar
Putting it all together
  • Place raisins and dehydrated fruit besides the cherries in a large bowl; cover with boiling water, cover, and let stand for 5 minutes. Drain well reserving the liquid, and set aside.
  • In another large bowl, cream shortening and sugar. Add eggs, one at a time, beating well after each addition. 
  • Mix  in 1/2 a cup of cooled reserved liquid from the fruit and soured milk together.
  • Beat in vanilla. 
  • Combine the flour, cream of tartar, salt and baking soda; add to creamed mixture alternately with milk. 
  • Dust rehydrated fruits and nuts with flour.
  • Fold fruit and nuts into the batter until well incorporated. 
  • Spoon into nine greased 5-3/4x3x2-in. loaf pans. Bake at 300° for large loaf pans65-75 minutes or until a toothpick inserted in the center comes out clean. Cool for 10 minutes before removing from pans to wire racks.
  • While the cakes cool, prepare the syrups.
                     The simple sugar syrup-
                     Place sugar and water into saucepan, and stir over medium heat until all sugar
                     is dissolved. Set aside.
                    For the alcohol sugar syrup-
                    Place water and sugar into a saucepan, and stir over medium heat until all
                   sugar is dissolved. Remove from heat and stir in the rum. Set aside.
  •  When the cakes have cooled enough the remove them from the pans, brush all sides heavily with either syrup. 
  • When completely cooled, wrap each one in several layers of cheesecloth. 
  • Brush the cheesecloths with remainder of the syrup. They will be sopping wet.
  • Wrap each loaf in aluminum foil and place the loaves in the refrigerator. Make a note as to which has which syrup. I use my vegetable bins.
Do this weekly for the next five weeks- remove the aluminum foil, brush cheesecloth heavily with the syrups, rewrap them in foil, and place back in the refrigerator.

When gifting this fruitcake find an appropriate lined tin or box, remove the foil and cheesecloth, and gift away. When using it for your own entertaining, slice it, and serve on a festive platter. Enjoy!

Y'all have a blessed day!
Cockeyed Jo


Sunday, October 27, 2019

The Great Chicken Experiment Continues

So we are in the process of hatching out our own chicken eggs. We decided to hedge our bet with an additional 18-gallon tote with another dozen eggs. I'd do two dozen, but we only have three layers and some eggs are needed for our use.

That's the other need for more hens, the egg production. While we have five hens, one has taken to laying her eggs halfway down the ravine. Although she occasionally surprises me by laying an egg in the box, one just hatched out a chick and is busy teaching her how to be a free range chicken. Yes, the baby is a pullet so Mel won our bet. Two of the five are older girls and lay sporadically.That leaves only one hen who actually lays her egg in the nest box.

Our free range chickens in happier days
This behavior will change during winter when they are penned up for their protection. But then, egg production goes down to them laying every other day for the hens. The hens we've got two will be entering their 4th laying year and the current layers will be three is the spring. We need a new batch of layers. Here's hoping at least three of the upcoming hatchlings are are the RIR/Buff crosses. It will allow Hoo-de-hoo (Buff Orpington rooster) to have a flock of his own to rule over instead of the running/mating/running from the RIR rooster (Lil Red) he's doing now. He'll have Goldie, the new hen, and three more hens to keep him occupied in the spring. He'll have to step up and grow out of his teenage behavior of just getting him some. 😀

credit
So if we only end up with ten out of twenty-four hens, I'd calls this experiment a total success. I can cull the roosters at 13 weeks or they get big enough to do so. The Buffs and RIRs are hard pressed to reach culling weight at 12 or 13 weeks old. At least that's our experience with these two breeds. It's closer to 16 weeks old before their size and weights hit the broiler mark.

I can handle harvesting two a day at most on my own and that's it. Without a chicken plucker machine, turkey fryer setup, a large work stations, and extra hands...I ain't gonna do it. I can foresee dozens of chickens that will need to be culled in just one cycle. Of course, she might just sell them at the local farmer's auction too. That would be the best option.

Even though Mel hates killing animals, she's not opposed to someone else doing it. When it comes time to cull out a dozen or so undesirables from her business, she'll find a processor to handle that aspect of the job for her. I don't mind harvesting and butchering chickens for our homestead and our needs, but she wants to make dog food from it to sell. So that's all on her.

Sort of like this.
Meanwhile, I'm getting closer to raising and breeding quail. I've dismantled two of the stand alone rabbit hutches. I've torn the ripped, rusted wire out of them, mainly the bottoms. They were built with 1/4" hardware cloth originally. I'd have to raise the bottoms up by at least a foot anyhow for the quail. With the current 30" height of the hutches, the birds would break their necks if startled. Most quail people set their heights of their cages 12"- 18" so this won't happen.

When Mel originally built the rabbit hutches, she left a gap between the upright cages for an oil pan to slide underneath to catch the droppings. A couple of things happened to make her system not work as planned. 1) she didn't allow for wiggle room to allow the wood supports to swell. 2) She didn't allow enough of a gap to allow us to pull the pans without dumping rabbit poo on the lower occupant.

She built the cages by the pan's size 47 x 25 x 30. The cages fit over the pans perfectly. If she'd lowered the drip pan opening by 6-12 inches it would have been totally perfect for the rabbits and us. I learned from her mistake coming along a full year and a half after they were built.

Having dealt with hardware cloth before with building rabbit cages, I knew just what to do to prolong the life of the hardware cloth bottoms on the cages. Brush them first with latex paint. No, not the type you paint your house with but Plasti Dip. It forms a coating around the welded wire mesh similar to the coating on shelving wire. It will last for many years. It also helps strengthen the Closetmaid or Rubbermaid wire shelves. I haven't found 1/2" cage wire on the market, but this is the next best thing.

It's about $6 a can for 14.5 oz. Although they sell this in a spray can also, I choose the liquid kind that I brush on with a small disposable brush. I find I get a thicker, more uniformed coverage of  the hardware cloth. I thought of buying 1/2" mesh hardware cloth instead of 1/4" because of the thicker coverage on the wire with Plasti Dip. I'll pre-cut the bottom pieces first. I just paint it on both sides and let it air dry for a couple of days. Waste not, want not. This way I can paint over the rough cut areas, encasing them to reduce me looking like I ran through a thorny patch of briars.

I'll be placing center support beams across in inside of the tray holder too. Something that was missing from the original design. I'll raise  the position of the drop pans where they were originally but raising the bottoms of the hutch up will give me ample space and ease of cleaning the droppings pan in and out. I'll have to clip the hardware cloth at the front of the cage to accommodate the new drip pan placement.

I'll do the same for the second cage. I plan on keeping a small trashcans underneath the cages to store ground food and oyster shells so they'll be right where I need them when I need them.

So that's what we've been up to this week, how about you?

Y'all have a blessed day!
Cockeyed Jo 

Wednesday, October 23, 2019

Cooking with Chef Jo: Planning My Fruitcake- Maraschino Cherries

Maraschino cherries have a bad rep. Mainly because of the commercial processing. It's true all the bleach, fructose, sugar, and red dye #40 will make most people keel over and die, but not my version.

2L from Amazon
The only deterrent to my recipe is the alcohol I put in them to flavor and preserve them. It's clear and a bit costly as it's imported from France. No red dyes here. The distilling into alcohol kills all the nastiness that comes with commercial farming operations. I also bring it to a boil after adding it to my syrup mixture to reduce the alcohol in my maraschino cherries. It's the only preservative I use and it's all natural. Of course you could make a super adult version of this with vodka and brandy, or whiskey. I prefer to keep mine PG-17 and simpler. Be aware that this process is two weeks long instead of 3 months long with other liquors.

My Maraschino Cherries
4-Qt jars (4 will last us two years)

What you'll need
4 lb Cherries, sour if you can get them*
3 tsp almond extract
2 cup sugar
2 oz lemon juice,freshly squeezed
3 cup water
4 cinnamon sticks
1/2 tsp nutmeg, freshly grated
3 cup Cherry Kirsch

Note* I have a friend that grows Romeo cherries. He's the one who convinced me to plant the Romeo and Juliet cherry trees in my own orchard.  In two years I should have my own cherries to make this with.


Putting it together
  • Wash and pit the cherries
  • Put sugar, water, lemon juice, cinnamon sticks and grated nutmeg in a saucepan
  •  Over medium high heat, stir until sugar is dissolved and the syrup is at a rolling boil.
  • Add the kirsch and the cherries. Turn heat down to medium, bring back up to a boil.
  • Boil for two minutes, and then remove from the heat.
  • Remove the cinnamon sticks. They've done their job.
  • Pour the cherries and liquid into sterilized quart mason jars.
  • I water bath these jars for 20 minutes to seal.
  • Let sit and get happy for two weeks before using.
I use my maraschino cherries for something special like on top of banana splits, to top certain desserts like black forest cakes, or in my chocolate covered cherries, or Christmas cookies, and of course my fruitcakes. These plus my extracts and wines used in cooking are my only break I have with 'no alcohol passes between my lips' being a 33-year recovering alcoholic. They are further cooked to reduce the alcohol content to almost nonexistent.

Summer is a busy harvest time for us. I'll be canning and dehydrating a bunch of food stuff. I'll put about a pint worth of my maraschino cherries on a tray to dry them out. I'll be making six full loaf pans and assorted mini loaves of my fruitcake to enjoy, entertain, and gift giving at Christmas week.

While I'm dehydrating the cherries on one rack, peaches, apricots, pineapple, white grapes, and figs are dehydrating on the other racks. Some of these are also be going into my fruitcake. The rest go into the stores building for other uses. Late summer is the time for cracking nuts. I used to use walnuts, but they've gotten so darn expensive. I have another friend who grows no chemical, paper shell pecans. He'll let me pick them up and charge me $2.00 a lb. Or, if I bring him my pecan maple cakes $1.50 in a pound for pound trade. It's wonderful having locals to barter within our county.

Now, that we have all the fruity and nutty ingredients done, it's on the the batter and baking of my fruitcakes plus why they go into the refrigerator by Halloween is for next week.

Y'all have a blessed day!
Cockeyed Jo


Sunday, October 20, 2019

The Great Chicken Experiment or ...

Mel's latest money making venture. Namely, becoming a chicken farmer. Her plan includes selling chicks, pullets, cockerels, layers, roosters, and eggs. She has narrowed the breeds to two with a possible third: Americana and Rhode Island Reds with Buff Orpingtons as a possible third.

We are well versed in the hatching, raising, and caring for two of these breeds. Currently owning Buff Orpington and Rhode Island Reds, we have learned their personalities and manners. We love both of these breeds and highly recommend both breeds for southern homesteaders. Both of these are dual purpose (meat & eggs) breeds with cream to brown, large eggs. They are prolific egg layers.

The new kid on the block will be the Americana breed. They are a cross breed of Ameraucana and Araucana breed chicken. As a novelty egg layer, hens lay colored eggs between olive green, blue, and turquoise eggs. The layers are less robust than the orpingtons and the reds, but about 240, medium sized eggs a year. Just think, no chemically dyed Easter eggs for Easter!

We may be adding some Silkies are mother hens since they have a great reputation for broodiness and mothers. We'd much rather raise chicks the way Mother Nature intended. While Rhode Island Reds RIR) are not known for broodiness, our Black Butt has turned out to be an excellent mother just as Broody. aka Gimpy, was to her last brood of New Hampshire Red chicks. I'm holding out for Goldie, our remaining Buff hen, to go broody. That breed is supposed to be broody, but she hasn't yet at two years old.

So we are getting a jump start on hatching some chicks of our own with our cockeyed incubator. (Instruction below)Yes, we know it's late October, but we're just in an experimenting stage. These eggs we've gathered from our free range birds could have been fertilized by Big Red (RIR) or Hoo-de-ho, our Buff rooster, or not fertilized at all. We'll have to wait and see.

In the meantime, we set up the our cockeyed incubator today. Now we have a standard electric incubator, but we've had better hatch rate this way. We've managed only a 75% hatch rate with the electric incubator with ours Mel managed 6 chicks from 6 eggs. (it may have been beginner's luck too.)  In case you can't figure it out, that's 100% hatch rate.

So, do you want to know how we did it? This time I took pictures while Mel set it up.

Our Cockeyed Incubator
(it was copied from similar models on YouTube)

What you'll need
An 18-gallon tote
A heating pad (ours has three settings low, high, and off)
Several beach towels
A small bowl
A sponge
Light fixture with 100-watt bulb, we use our brooder box light
A temperature probe (mine was one I used as a chef)
A pencil
Unrefrigerated eggs, 1 week or less old

Putting it together
Step 1
We laid a heating pad on a folded  a beach towel fold it into quarters. We
turned the heating pad on high. Our heating pad is an older model that does not cycle off when the temperature has been on too long.


STEP 2

We folded another towel and placed it inside the container. This gave the eggs a comfortable cushion with a cotton pillowcase for the eggs and to stabilize them. We can bunch up the pillowcase easier than the towel to keep the eggs in position.


STEP 3
Next we placed a thermometer in the tote and the 100 watt bulb in the tote.Notice we have not punched any holes in the tote. We can reuse this tote for a large optional storage solutions later after cleaning it with bleach, soap and hot water.

STEP 4
We placed a small bowl and a sponge in the corner away from the eggs but still on the heating pad.We poured boiling hot water over the sponge  Enough to soak the sponge and leave 1/2" in the bowl. You'll maintain this until hatching is complete.

STEP 5
Check your eggs carefully. If one appear abnormally large, it's probably a double yolked egg. (Miss Greedy Piggy is notorious for giving one of these a week). It may not hatch or develop twins. Not a good choice for hatching, but wonderful for baking with. Some eggs may have tiny cracks or a hole in the shell. These are also good candidates for hatching. Heavily soiled eggs (feces or dirt) also should not be incubated also. Have them for breakfast instead. Two of our "to be hatched" fell into this category so we are hatching 9 instead of 12.

STEP 6
Take each egg an draw an "O" on one side and an "X" on the other with a pencil. I know some people who do this with a marker, but I have concerns of the chemicals leaching through the porous shell. Do you know what chemicals or dyes are in a Sharpie marker, I don't either so I don't want it anywhere near my chicks.

We'll place the marked eggs  onto the towel "O" side up.


STEP 7
We will be manually turning these eggs  four times a day until day 17. The "X"s and "O"s will tell us it has been done without yelling at each other to ask. We start at "O"s and the evening it's "X"s. Then we'll start again at "O"s again in the morning.

When we open the box to turn them, we lose all that lovely humidity and warmth the eggs need so we'll pour some hot, steamy water into the bowl before we close the lid again. Each morning turn, we'll empty the bowl, squeeze the sponge, and add fresh boiled water again to the bowl.

STEP 8
Place the container lid on the container. To regulate the temperature, simply open the lid part way if it's too warm. If more heat is needed, cover the whole tote with a blanket. Remember to plug the cords into a power strip and make sure it works. Do not add your eggs until you reach 99 degrees in the tote. It will do so in a few hours. We do a standard 12 hours and check it frequently.

We will candle these eggs when we stop rotating them. We will discard any unfertilized eggs. It's doubtful with two roosters doing their rooster business on the so few egg layers, but it can happen, right?

***************
With our nighttime lows dipping into the low 50s, we cover them at night too to help maintain the temperature overnight. We don't have CH/A, but it's too warm to start a fire in the wood stove so we do what we can to compensate. Mel has hatched chicks twice now with 100% hatch rate. The first time in February 2014, she chocked it up to beginner's luck, but a second time  in 2016 was more than beginner's luck.

If the chicks that hatch and survive fall into the RIR/Buff category, the hens will go into the household use (personal use or eggs for sale). Otherwise, (especially cockerels) it's the canner pot for them when they reach harvest age and weight. The true RIR are born, they'll be separated to start Mel's egg farm operation.

That's the plan anyhow. But you know what they say about don't count your chickens before they hatch. Projected hatch date is November 5th or there about. Wish us luck.

Now, in the meantime, I've been researching Pharaoh quails.  Since Mel and I are are dark meat fans, it only makes sense, right? They are all dark meat and easy for me to care for and be  harvest by me alone. We also have unused rabbit hutches outdoors. I'd only have to redo the hardware cloth, but we have to redo it that anyhow if we move the rabbits outside and we have enough hutches for ten rabbits which we have two. We lost Alby and Moira this week.😥

Mel's on the fence about this. If there's a market for chickens and eggs wouldn't there also be a market for quail? Of course, they wouldn't be free range nor "organic." But, they would be antibiotic free. I imagine I could come up with a seed and grain mixture like I supplement the chickens free range feedings with during winter. Still researching options on this. I can fit a whole lot of quail in two 37" x 29" rabbit cages (5.5 sq ft) plus the surplus rabbit cages we have. I'm just saying, waste not, want not.

Y'all have a blessed day!
Cockeyed Jo

Wednesday, October 16, 2019

Cooking with Chef Jo: Planning for My Fruitcakes-"Citron"

This isn't mine, but close
Love it or hate it, fruit cakes from scratch takes time for the preparation in making them. From dehydrating the fruits, shelling the pecans, making the batter, and aging the fruitcakes take months! There are a lot of steps in preparation for making my fruitcakes.  You could always cheat and buy the dehydrated fruit at the store. But doing it my way, is a labor of love and tastiness.

I'll be dedicating the next several weeks to this process and show you the finished product.

It starts the winter before when Meyer lemons and clementines (aka mandarin oranges) are in season. I still purchase these because my own potted trees haven't fruited yet. Next year, I should have my own home grown harvest. We are starting with the "citron.." I love this recipe for "Citron" tea as well as citrons for my fruitcakes. I'll can it for the tea and later dehydrate some for my fruitcakes but it all starts the same. Citrons are not grown in the US so, I'll make do with what's available. The taste difference is marginal.

"Citron" and Honey Preserves
7 half pint jars

What you'll need
Not me, but Mel
10 Meyers lemons, fully ripe they should have very little pith around the fruit
5 mandarin/clementines, pith and veins removed if you can
2 cup raw honey
1-2 TBS water

Putting it all together

  • Scrub the outside skina of the room temperature fruits with a solution of 1tsp baking soda, 1 tsp vinegar, to 1 gallon of water even if the produce is organic. Cut out any bad spots.
  • Thinly slice (1/4") the clementine/mandarin oranges and lemons. Chop each slice in 2" pieces picking out any seeds.
  • Place oranges into a saucepan.
  • Over low heat, add 2 TBS of water so the oranges do not scorch. You want to warm them through not boil them.
  • Measure out the raw honey into a bowl and add the lemons.
  • Stir in the warmed clementines/mardarin oranges.
  • Stir well to coat every piece.
  • Put it into half pint jars and cover.
  • Leave the jars on the counter for three days to get good and happy, and for the juices to meld with the honey.
  • Refrigerate the jars for the most nutrition benefits.
  • Or, water bath can for 10 minutes. You lose some of the benefits, but it becomes shelf stable.
    For the fruitcake mix, I'll strain the fruit. For God's sake, reserve all that great honey mixture to put in regular hot or iced  tea. Place the fruit on a jelly roll dehydrator tray and dehydrate (about 24 hours @160 degrees). Be aware that the dehydrated fruit will remain it's moist stickiness due the honey, but the orange and lemon are dehydrated. Refrigerate until ready to use. I'll dehydrate a full batch of this recipe for the fruitcakes so after the three days of allowing the fruit to meld, I'll dehydrate it.

    For Citron Tea, I'll put almost 2 TBS of the preserve in a mug and fill it the rest of the way with boiled water. I'll let it steep for 4 minutes and enjoy on a cold winter's night. For added nutritional boost, munch on the fruit after you've finished your tea. Or for summertime refresher, take 2 half pints and 2 qts of boiled water, let it steep, and then pour it into a gallon pitcher filling the rest with water. It will cool you down and refresh you in short order.

    I'll usually make two batches. One batch for each.

    Stay tuned to next Wednesday for another ingredient to my fruitcake.

    Y'all have a blessed day!
    Cockeyed Jo

    Sunday, October 13, 2019

    The Cockeyed Homestead is Redoing Everything...

    I received this response to a comment I made on another blog. It's true, but then again false.When I speak of redoing/revamping/changing focus for our homestead, it falls in various headings.

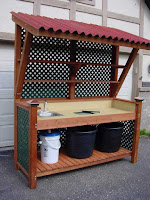
    When I wrote about doing or redoing the back porch kitchen, it was to make the cooking/ canning area a more efficient work space for me rather than a couple of rough wood counters with a three-burner cook top and a grill. We actually used scrap wood and a counter top with sink that I bought when we were planning a butcher station. It works better this way for the expanded canning operation I do each year. With the addition of plastic sheeting over the screens, I have made it into a cold weather greenhouse with plenty of space for the growing transplants and not cold tolerant trees to be housed during winter. This falls under expanding and completing the intended tasks.

    Similar to my old setup
    The butchering station fell through the cracks in our relationship, Mel's and mine, we just didn't know enough
    quirks about each other at the time. The plan I made for here was a carryover from my previous homestead where I raised meat rabbits and chickens to butcher and eat. The same went for hunting. For decades, I fed small rodents( not rats) squirrels, random rabbits, and assorted smallish critters that wasn't essential for our food needs to make and supplement our dog food.

    While Mel, being a dyed in the wool carnivore, belonged to PETA and was against killing animals. I guess buying it from the grocery store was okay. I asked her if when she went fishing did she catch and release the fish, or cook them up and eat them. She answered she ate them. It boggled my mind at her paradoxical relationship between food and where it came from. I finally realized, it was the loving, nurturing and caring before the killing she had for our livestock that was the problem. Anyhow, the countertop and sink didn't go to waste.


    I spend quite a lot of the time in our kitchen. That's one of my main jobs on the homestead. In our bi-annual top to bottom scrub-a-thons, I noticed how shabby the cabinets looked and how the previous owner had painted the cabinet hinges as well. A fresh coat of paint and redo on the hardware was needed.  If you don't take care of what you've got, it won't take care of you.This fell under maintenance. The fact that it looks so much better puts a smile on my face.

    We've finally found the culprit behind our leaky ceiling. It was the gutter. It filled with rain water quicker than it could be drained away. An additional drain spout fixed that problem. So simple but so hard to detect with the insulation and ceiling tiles in the way. This is repair and maintenance. As will the ceiling when we complete the project this winter.

    We've worked on the wiring and plumbing in the house. Let's face it, we are living in an over thirty-year old double wide trailer and it sat abandoned for seven of those years. The people before us made renovations that were cockeyed and half-assed like water lines out of flexible black hoses with garden hose splices, buried only 6" underground from the well to the house. Come on! Who was standing behind the door when God gave out common sense?  So somebody that knows how to do it right has to correct it... namely me holding the purse strings for someone else doing the work now. This is maintenance and repairs.

    That's a lot of our revamping comes from necessity. Like changing the angora rabbitry into a stores building. We had jars in ever nook and cranny. We lost half of them not knowing where we put them. Buying staples for 6 months to a year was impossible. Building a new bunny barn to now, a chicken/bunny barn. It goes under improvement, future income, and growth.

    Mostly it's Mel changing directions to find a viable way to make an income since nobody wants to hire a woman her age and attitude. She got tired of caring for the angoras and couldn't get the hang of spinning, so we decided to downsize our rabbitry/fiber production operation. This revamp goes under future growth and income.

    The deaths (not by choice) this year of 5 out of 9 rabbits put us right where I wanted to be for a continued small production rabbitry. I can breed them if I find I can handle more without Mel. She got her wish. She's lost interest, but I haven't. So I have enough now to keep me happy with caring and grooming them, gathering and spinning their fiber, and selling the surplus. This falls under maintenance and income.

    Meanwhile, the extra space will start Mel's new interest, chicken farming. The hatching, raising, and selling certain breeds of chickens at different ages. Selling chicks, pullets, roosters, layers, and eggs can be quite lucrative as a money maker for the homestead. With more coops and runs to come later. Improvements geared for future income.

    Nothing is ever wasted on a homestead. It goes through several reincarnations as the trial and error process continues. It meets our needs and that's the important part. Everything changes. It's improved upon, converted, reinvented as needs arise.

    So yes, the Cockeyed Homestead is redoing everything constantly. We are constantly evolving over time as needs arise. Nothing is stagnant or it dies. So hang in there with us as we repair, renew, and repurpose this once abandoned property into our dream of the most self reliant, and organic lifestyle that we can. We ain't done yet with our shoe string budget.

    Y'all have a blessed day!
    Cockeyed Jo


    Wednesday, October 9, 2019

    Cooking with Chef Jo: Triple Berry Delight Jam


    On Sunday, I mentioned my Triple Berry Delight jam. I got emails for the recipe. If you haven't watched our YouTube video of this, I'll include it at the bottom like I did before. Even if you've watched the video and wanted a written recipe for Mel's favorite jam, here it is. Mel doesn't like strawberries. I never heard of such a thing, but she doesn't so I created this recipe for her. By the way, I LOVE all things strawberry. Such is our odd couple housemate relationship. I provide for her needs and mine with my gardening and canning.

    Triple Berry Delight Jam (no pectin recipe)
    5 1/2 half pint jars or 3 pint jars

    What you'll need
    4 cups blackberries, blueberries, and raspberries, equal amounts slightly mashed to release the juices
    1 TBS lemon juice, use bottled not fresh squeezed
    6 cup sugar
    1 tsp butter, if needed

    Putting it all together

    •  Since the berries ripen at different times, I wash and freeze the harvested berries until I have enough for two or three batches of jam before I start this recipe.
    • Thaw the berries reserving the juices.
    • Slightly mash the juices to get more liquid to equal four cups. I don't know about you, but I like chunks of fruit in my jam.
    • Pour fruit and juices into a heavy bottomed saucepan.
    • Add the sugar and lemon juice.
    • Stir well until sugar is dissolved and turn on cook top to medium low. Scrap the sides well.
    • Continue to cook stirring occasionally to keep jam from burning on the bottom.
    • Check for jelly stage. The fruit mixture will have reduced by half.
    • Water bath can for 10 minutes. Cool and store for later
     I usually double or triple this recipe depending on the harvest or foraging results for a year. This is the way my grandmother made jams and jellies. It takes more sugar than pectin assisted jams to get the right consistency and quadruple the amount of cooking time. But, if you ain't got pectin or a thermometer, it's a sure fire way to make jams and jellies.

    Y'all enjoy.

    Y'all have a blessed day!
    Cockeyed Jo


    Sunday, October 6, 2019

    Even Mother Nature Failed Us This Year

    We've got a slew of wild blackberry thickets on our property. Considering over an acre and a quarter is still an overgrown mess, this is far from surprising. They are good for about five-gallon bags a year of this juicy, succulent fruit.

    We only harvest five gallons worth because that's all we need for a years worth.  Mel eats as much as she picks. Actually, more as she heads to the creek and none get in the bag. I'll grab a few and bag the rest. Who can resist popping a few in your mouth while picking them, right? That's the beauty of organically grown or wild foraging your food. The other problem we have trouble getting to them all the thickets are so thick. Remember, this property was abandoned for seven years before Mel rescued it. Well, the birds eat well and the seeds, from those berries that drop, replant themselves for even a thicker thicket next year.

    As we've clear the property of undergrowth, foot by pain painstakingly foot, we leave strategic areas for blackberry patches. Those on the way to the creek, along the driveway, around the orchard, and patches by the chicken houses are left to grow and flourish. Why only those areas, you may ask? Well, they are semi-contained and easier for me to get to for picking and Mel can snack on while traipsing our property. Of course, there's the untended land that we haven't even bush hogged yet and the ravine is impossible to bush hog... it's too steep of an angle. That's another purchase we need, way down on our "to purchase list," a bush hogger attachment and a bigger tractor to do it with. It'll save our friends up the road to do it for us. Not that they mind doing it. We ply them with food and goodies... to eat and take home as a form of payment.

    But this year, even Mother Nature failed us!
    I've lamented about our garden and orchard for months now, but Mother Nature has always provided. This year, I watched for the tale telling signs of  the whitish cream colored blooms heralding the season. All spring and summer long, I waited except there was no show of blossoms. No flowers equals no berries. Discounting hospital stints,I might have missed it. I actually walked the driveway looking for fruit. None, nada, zilch!

     So much for making Mel's Triple Berry Delight jam I make for her each year. No blueberries (homegrown), no raspberries (homegrown), no blackberries (wild homegrown) equals no jam unless I purchase the frozen varieties. I refuse to do this just on principle alone. Well, she's just got to ration what we've got after thinning and recanning  the jam out a couple months ago. Not that she'll like it much. She wants what she wants when she wants it. Not that there's not other jams and jellies she can't eat. The strawberry jam and orange marmalade are mine and mine alone because she doesn't like either.

    Regular prepper's pantry
    So, our bad year for harvesting has gotten worse. Oi veh! It's just a bad year for us and we are praying for a better year next year or we'll be back to buying produce. Such is homesteading organically. You have great years, not good years, and failures. You've just have to roll with the punches Mother Nature doles out. In the great years, you put up enough to cover the not so good and failure years to carry you through. As we said once on a YouTube video Tea Time, We aren't preppers in the conventional sense of the word. We are self sustaining preppers. We prep for a failed season or two not ten or twenty years worth. That's just insane.

    We may eventually reach the five-year pantry, but we'd have to clear another half-acre and build the soil up some. It would involve cutting down more trees, pulling up stumps, tilling up the hard clay soil with adding about an easy ton of compost, and waiting for the new planting area to mature (a season or two). But, we could plant upland rice in the area while we wait, thanks Leigh for the research and trial, or orchard grass for the bunnies to speed up the ground breaking up/ maturation time. But mainly we have to have a couple great harvesting years with Mother Natures cooperation.

    Y'all have a blessed day!
    Cockeyed Jo


    Wednesday, October 2, 2019

    Cooking with Chef Jo: White Clover and Honey Jelly

    One of the many hats I wear is for herbalist & aromatherapist. Yes, those are two of the sheepskins, I'd wallpaper my walls with if I ever got 'round to it. I believe in being an observer of life and a forever student.

    When I was a research and development coordinator for a herbal products company, I created a recipe for an tea which alleviated symptoms of colds and flu aptly I dubbed it "Cold Caught Me Tea," My daddy always said, A cold caught me because nobody in their right mind would ever want to catch a cold." A marketing company decided to change the name of it and the company decided to go with their suggestion. You may still see it on some supermarket shelves today twenty years after I created the initial recipe. But enoigh tooting my own horn on to today's recipe.

    With the changing of seasons come cold season. That's the inspiration behind this recipe. Some people just make it and eat it because its mild apple like flavor. I'll eat or drink it whenever I feel I have a scratchy throat or when I begin to feel under the weather. It's my go-to other than kimchi to circumnavigate a cold catching me.

    In the spring, I gather white clover heads and dry them. When I have about 1/2 a pound of clover, I'll save any overages for the next batch. I'll make this up and store it for when I need it. It's historical uses for this humble weed include coughs, fever reducer, cleanses the blood, expectorant, and antiseptic. It also reduces pain and swelling of arthritis.

    And, you thought they were only an obnoxious weed. :oP  You want full blossoms not the spindly sparse ones like is pictured on the right bottom. If you pulled some clover leaves, it's all good too. On to the recipe...


    White Clover and Honey Jelly
    A jelly that alleviates and boosts your basic electrolytes when you feel like a cold is coming on.

    What you'll need
    1 cup white clover blossoms, fresh or dried
    3 1/2 cups of boiling water

    3 cups sugar
    1/2 tsp sea salt
    1/2 cup lemon juice
    1/2 cup honey, raw if you can get it
    1/2 cup lemon juice, freshly squeezed, bottled if you have to
    1 box fruit pectin
    1 TBS butter

    Putting it all together
     
    For all you visual learners out there
    • Steep clover in boiling water for 8 hours, loosely covered.
    • To a heavy bottomed saucepan, add the clover infusion.
    • Add remaining ingredients except for the pectin.
    • Bring to a rolling boil. A hard boil that can't be stirred down.
    • Add pectin, stir until dissolved and bring mixture to a boil.
    • Stir constantly for one minute.
    • Turn off the heat.
    • Ladle into hot, sterilized jars.
    • Wipe your rims, lid and ring the jars.
    • Flip jars lids side down on several layers of towels.
    • Wait 10 minutes. Flip jars right side up snd let cool.
    • Check the deal, wash the jars, and label. 
    • Store in cool, dark place.
    To serve-spread a tablespoon of jelly onto s piece of toast or stir a tablespoon into 6 oz of boiled water. For optimum
    benefit, do this 3 times a day.
    WARNING- Ingesting too much clover is hard on the kidneys.

    Y'all have a blessed day!
    Jo