Our Mission

To live a self-sufficient and organic lifestyle for the next half century. With the Grace of God and the power of prayer, we will succeed. Nothing is impossible with His help. It wouldn't be us without laughter and joy at the Cockeyed Homestead.

Find out more about our homestead on these pages

Sunday, September 29, 2019

Is Preserving Your Own Food Safe and Cost Effective?

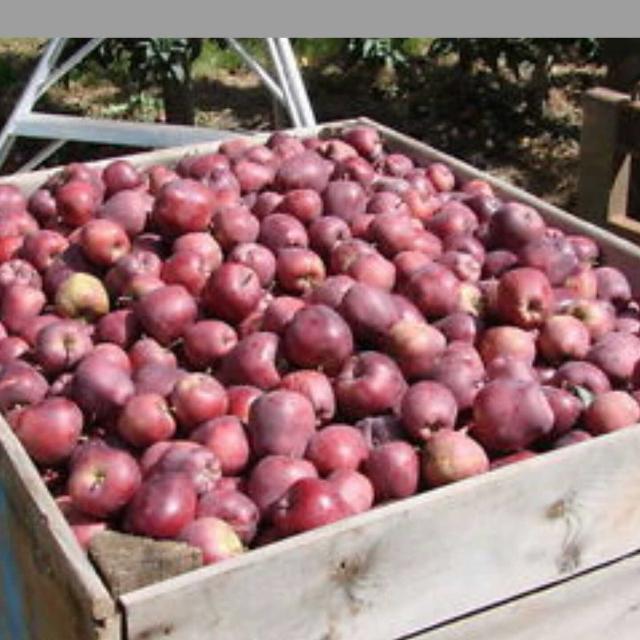
As you may have read in my last post, I'm up to my ears in apples! Well, not really, but still a lot. Since our orchard didn't produce this year, I've resorted to buying deer apples again. Why? Because they are cheaper to purchase. At $15, a bushel, it's a better way of preserving for my apple needs. Store grade apples, the pretty ones, sell for $3.23 lb (organic). That's $209.95 for a 65-lb bushel. Say it together now CHA-CHING! Smart savings! I calculated I'd need four to five bushels for 1-2 years worth of apple products.

Let me break down the math for you. All of these are pre-tax prices. No labor costs are included and I'll admit to labor cost being high in the homesteading option, but I have nothing but time.

In a year, we use...

 STORE BOUGHT
7 gallons of Apple cider vinegar (for cleaning, cooking and other household uses) @ $2.68 for each...$18.76
6- 12 oz jars of apple butter @  $2.50 each...$15
10 gallons of apple juice @4.75 each... $47.50
6- 16 oz jars of applesauce @ $2.99 each...$17.94
4-16 oz jars of apple butter @ $2.86 each...$11.44
18-12 oz cans apple pie filling @ $3.12 each...$18.72
5- 12 oz jars of apple jellies/jam @ $3.19 each...$15.95
5 boxes of fruit pectin @ $3.59 each...$17.95
2 lbs of dehydrated apples  (even at the Dollar Tree)...$36
2 tanks of gas, oil, maintenance of vehicle @ $2.58 per gallon (17 gallons) averages out to$100.
That's $214.21 in apple products a year for 2 people.

Now take a look at the numbers for the same home preserved products shall we?
7 bushels of organic apples... $105 (will almost free when our trees start producing)
10 lbs sugar...$17.85
3 TBS sugar $0.50
3 lemons...$3.00
193 lids for canning jars...  (bought in bulk) $3.57
4- 5 gallon food safe buckets...FREE, Grocery bakery trash

193- pint and quart canning jars and rings...FREE
Propane, electricity, gas... Averaged out to $35
That's $162.10 in apple products a year the homesteading way.

In favor of canning my own...
  • It's only about a $52 savings now, but oh, the benefits. I know I'm getting an organically grown product. 
  • I'm eating local. The source 40 miles from me. 
  • I know everything about these apples because I know the grower. 
  • I know what is in my food.
  • It's made to my tastes rather than having to tweak it.
Conversely
I can't say the same thing about store bought product.
  • Food inspectors allow for so many insect parts, foreign debris.
  • They aren't standing over each and every employee to watch them wash their hands or see if they are sick or not, nor where they've been in their work clothes.
  •  A fairly recent survey (2005) prove it. What percentage of women do not wash their hands before returning to work unless someone else is in there too? Drum roll please (ra-tata-tat) 75%!!! These are the people who are preparing and serving your food! Let's all go out to Mickey D's after this...uh, no.
  • Food inspectors only take small samples of huge volumes to inspect. What's been missed. 
  • The average length of a food inspector is an hour or so. So many places to inspect, so little time. They hit the most likely place for infection/contamination.
  • How many cases of food poisoning have you heard about regarding these points in recent years...mostly due to employee error- hundreds, thousands, or millions of people?
  • Have you ever asked to see an inspection report? Shame on you.
The numbers will change over the next ten years. Store bought will increase in cost, while the cost of my home grown products will continue to decrease with the maturity of our apple and lemon trees. Although, the price of sugar will increase too. Unless, we start growing our own sugar cane. That's doable too.

I reuse my canning lids when I can too to reduce my overhead. The lid price is IF I only can with brand new lids. I've thought about purchasing the Tattler lids, but that's going to be made over time in multiple purchases. I've got 1,000 pint jars (36 are wide mouth), 48 half pint jars, 24- 1/4 pint jars, 18 pint and a half jars (wide mouthed lids), and 48 wide mouth qt jars in my inventory. I don't use all those at once. But IF the SHTF, I'm ready. They'll be a valuable trading item. But having so many jars is a buffer against breakage. They are glass after all. For two or three years worth of canned meats, fruits, vegetables and condiments, I might use all of these jars in one sitting, but I doubt it. Add to this my dehydrated stores and maybe I'd fill them all. I'm still on the lookout for cheaper half gallon canning jars for things like dry canning cornmeal, sugar, flour, rice, and dried beans in. Carry around 3 and 5 gallons buckets every time I need to replenish household staples gets tiring. A half gallon jar fits so nicely in my shelves. I'm not a spring hen, nor a fall hen anymore as this year of illnesses has proven to me.

To buy Tattlers for that many jars is huge money to convert to Tattlers (@ $70 for a 100 or 12 dozen for $120) from Ebay for regular sized lids). The wide mouth jars are handy when canning certain items like meatloaf and special breads. But, the Tattler wide mouth kids are equally as dear @ 10 dozen for $90. Of course, you always need to have spares on hand just in case of an unexpected gifts of produce from friends and family like one of my subscribers who was gifted asparagus this past Spring.

Then, there is the problem like we faced. Sure, Tattler lids won't rust, but rats will chew through them. If a tin lid fails after numerous attempts to seal. you can repurpose it into something else (everyone find a use for little bits of metal. Or chuck it. It only costs pennies instead of almost a buck each. What about a Tattler? It's plastic. I don't know about you but in my mind, plastic equals disposable, but the cost is premium. I can come up with one possible repurpose use. A guard in the hen side to hold down waste in an automatic chicken feeder, but it may even be too small for that. I could probably think of some other ideas, but my brain is too busy thinking of ways to use what we've got already.

So is preserving your own food safe and cost effective? In my book it is. While buying product to can isn't the best way to do it, it still saves money. Yes, you have to work at it, but isn't that true for everything you've gotten or achieved? I know my body feels better without all those petroleum/chemical based fertilizers or insecticides in them. Your body is your temple treat it with loving care and it will continue helping you along your path. Or like my old computer programming days, GIGO garbage in, garbage out.

Y'all have a blessed day!
Cockeyed  Jo


Wednesday, September 25, 2019

Cooking with Chef Jo: Not "Lipton" Dry Onion Soup Mix Revisited

A reader commented on the previously published recipe "Where's the rest?" What can I say but "Oops my bad!" As much as I grumble  about articles posted online with obvious misspellings, poor grammar, and not getting to the point...it was my turn with this posting. For this, I apologize.

I could cite a number of excuses like I'm writing post stroke with aphasia, "Hey, cut me some slack. I'm typing one-handed here." or the computer had a mind of its own and ate it, but I won't. It was my error and not proof reading the post carefully before posting. Since I'm also writing a cookbook with all these recipes and more, it was a copy/paste error.

You may have noticed I use quite a few graphics in my blog instead of just text. In fact, my graphics folder on my computer has over 15K worth subdivided into about 50 sub-folders, and folders within those folders. I really dislike knowing I have something and not be able to find it. It's the same way with my documents and favorites, though not nearly as many. Organize and anal much? It's more for convenience, time crunches, and being practical.

I'm not opposed to buying the mix and have in a pinch, but the sodium is off the chain of the recommended AHA (American Heart Association) levels of sodium per day so I make my own from scratch to pare down the sodium.

Without further a due, My "Not "Lipton" Dry Onion Soup Mix."I'll give you the standard 2 serving as in a pouch of the store bought soup mix. When I make this I usually quadruple the recipe so I always have some on hand.

Not Lipton Dry Onion Soup Mix
Makes 1 oz dry serving of Onion Soup Mix or 1 pouch of packaged mix.
 
What you'll need
1/4 cup dehydrated onion flakes*
2 tsp dehydrated beef bone broth,* 1 tsp low sodium beef broth granules
1/2 tsp onion powder for extra oniony flavor*
1/2 tsp celery flakes or ground celery*
1/2 tsp garlic powder*
1/4 tsp white pepper
1/4 tsp smoked  paprika*
1/2 tsp Worcestershire sauce, added before service


Notes*- I dehydrate Vidala onions when in season. I rake through my dehydrated onions slices with a fork to flake them. No added sugar is necessary. I have substituted Texas Sweet for the Vidala with varying results..
I roast my beef bones with pepper before making bone broth. I always substitute bone broth for stock or bouillon for the nutritional boost. I dehydrate it using a jelly roll screen in my dehydrator.
I use our own, home grown garlic and onions dehydrated and ground into powders.
For celery flakes, dehydrate only the leafy parts and small stems of the celery.
I use smoked paprika rather than regular or sweet paprika for a subtle flavor boost.

Putting it together
  • Measure all ingredients and place in s air tight container. 
  • Shake well. 
  • Store in a cool, dark place.
  • When reconstituting this for soup, Bring 2 cups of boiling water to the mixture. If you make it in bulk like I do, 1/4 cup of shaken mix 2 cups.
  • Bring soup up to a boil again, cover and let steep for 4 minutes.
  • Don't forget the Worcestershire sauce!
Use this in all your favorite Lipton recipes like roast beef and dips, or simply garnish with green onions and thinly, sliced mushroom. 
Enjoy!

     Y'all have a blessed day!
Cockeyed Jo


Sunday, September 22, 2019

Fall? Changing Seasons?

On the 1st, I posted that Fall was here. Mother Nature had other plans. That lasted about a week, and then temperatures soared back into the 90s for daytime temperatures. The poor trees and grass have no idea what to do, and neither do we. What we all know is that it's hot!

I guess we should be thankful Fall did a gimme back. We still haven't sorted out our firewood situation so we've been granted a reprieve or extension.

It's apple picking time, not that our trees produced any. But little, ole Cornelia is gearing up for their annual Big Apple Festival held next weekend I believe. The main event will be by the Big Red Apple statue at the train depot and there will be corn hole tournaments, apple bobbing, craft fairs, I imagine Jesse and family will be bringing their alpacas again, and what good festival would be complete without a couple dozen stalls of food vendors?  I know what the apple growers are busy harvesting this week.

I may break down and buy two  to five bushels this year. "My God, woman!! Whatcha gonna do with all them apples?" my post here says some of what.  What I put up lasted a few months except for two jars of apple pie filling, one jar each of apple butter and jelly.  I also want to make apple juice and plain sliced apple, or maybe put Red Hots in some jars. I'm shooting for a year's worth, at least. I want more on hand. I didn't know Mel liked apple juice so much. She'll down a gallon by herself within two weeks.

Well two years ago, I bought a bushel (65 lbs worth) of deer apples and split them between apple jelly, applesauce, apple butter, and apple pie filling. With the skins and cores, I made fruit pectin and apple cider vinegar. In other words, I made a little bit of everything. I try not to waste anything if possible.

Heck, I may even dig up the volunteer potatoes in my garden and try my hand at making white vinegar or alcohol. Wouldn't it be neat to make my own vodka to go into my vanilla extract? I love trying something new. It has the added benefit of being one step closer to being self sufficient. It can also be used medicinally. No, it is not my intention to drink it. Nary a drop has passed these lips for 33 years. Now, I'd have to plant a 50' row for Mel. No, she doesn't drink that much. Experiment small, and then go hog wild! 😜

This is a 1/2 bushel bag
I may not buy the premium apples at the festival for all of this. I'll buy a few for fresh eating. But to preserve? That would cost huge bucks. I'll go for the deer apples again. They ain't so pretty, but the insides are good.

I do know the chickens will be under foot while I cut out bad spot, peel, and core them. They'll fight over whatever I drop. I still remember Houdini, aka Hoo-De-Hoo, running away from under my table with a whole apple in his beak that I had dropped. It was really wormy and not worth saving. I do it all at the patio table outside because that's a quick hose down clean up. I'll be up to my elbows in apple juice so a shower will be in order when I finish this part.

It took a better part of the a morning to peel, core and slice one bushel of apples. Cooking and canning well into the night, but I got it done. I've got a feeling after processing four bushels, let alone five bushels and four days of labor, I won't want to see, smell, or eat an apple for a few weeks. I just know me. I'll be all appled out. But come winter, the thought of apple crisp/crumble or apple pies start running through my mind.

So Fall hasn't fallen yet. But, the apples are ripe, or ripening fast. I'll be canning in the back porch with the fan going for sure. I'll be passing along those recipes over the next month in lots of two or three a week on Wednesday's "Cooking with Chef Jo."

Y'all have a blessed day!
Cockeyed Jo

Wednesday, September 18, 2019

Cooking with Chef Jo: Mistake Beef Stroganoff

This week, I happened upon a happy solution to a mistake. The mistake- I thought the leftover raw ground beef in a Ziplock bag was a roast I split. There's only two of us here so I usually split a pound of beef. We were having a was spell so I was using the microwave to cook it. After I cooked it, I realized my mistake. Actually, I found the roast beef while pulling vegetables to go with the roast. Upon realizing my mistake, I rushed to the microwave, but it was a solid mass of well done ground beef. Not knowing what to do with this I stuck it the refrigerator until inspiration hit me as it usually does.

Beef Stroganoff!! Ding! Ding! Ding! Just slice the block  of cooked ground beef as I would with any other meat.

Now my original recipe of Stroganoff calls for a tender steak or sirloin tips cut into thin strips because this recipe comes together quick once the prep work is done.. A tougher steak takes longer cooking times, or a marinade to make it tender. As soon as the meat, onions and mushrooms are done, it's done. About the same time it takes to cook egg noodles (about 5-6 minutes). My sour cream is at room temperature so I just add it when I turn off the burner. It heats up as the pan cools to eating temperature not boiling hot.

I pulled the beef block out of the refrigerator and set to slice it. I was so aggravated when I   accidentally cooked it that I put the whole oven dish in the refrigerator. I'm lucky that or the other (glass dish with lid nor glass shelf) didn't shatter going from hot to cold. Now if had been the freezer, the dish would have shattered for sure tempered glass or not. The juices had jellied and fats solidified around this block of meat. I carefully scrapped this off. The small pieces of fat could go into the dogs' dinner bowls, but the juices would go into the Stroganoff for added flavor. It turned out so well, I thought I would share it with y'all. Now on to the recipe.

Mistake Beef Stroganoff
Serves 2

What you'll need
See how the ground beef resembles steak?
1/2 lb 80/20 ground beef
1 small onion diced
4 oz can mushrooms, undrained*
1/2 c milk
4 oz sour cream*
2 cloves garlic, smashed and minced or 1/2 tsp garlic powder
1 tsp cornstarch
1/2 TBS sweet paprika
1/2 tsp Dijon mustard
1/ 4 salt

                                                                    1/2 TBS butter

                                                                     1 cup wide egg noodles*
                                                                     2 tsp salt
                                                                      water
                                                                      Oregano or parsley, finely chopped


A skillet, saucepan, microwave, and something to stir with.

Notes*- I can my own mushrooms. They are a combination of mushrooms (white button, cremini, portabella, and oyster). I cook them with butter prior to pressure canning them in 4 oz jars.
I make my own whole wheat pasta. Heck, I even mill my own flour.
I make with buttermilk and heavy cream.

Putting it all together
  •  The night before, cover ground beef in microwave safe container. Because of the fat in ground beef, I do not recommend plastic. I use Pyrex. Microwave for 5 minutes. When cool, place in refrigerator for at least 8 hours.
  •  Place water in saucepan with the salt. When water boils, add your pasta and cook as directed. For me, 6 minutes. I like firm noodles. They are cooked but not limp.
  • In a skillet, melt 1/2 TBS butter while the the butter is melting, drain the mushrooms into a bowl. Add onions, mushrooms, and garlic. Cook until onions are translucent.
  • Add slices of cooked ground beef and jellied broth.
  • Add salt, pepper, and paprika. Stir well and cook until the ground beef pieces are heated through.
  • In the mushroom water, add the cornstarch. Stir well and add it to the beef mixture.
  • Stir sour cream and milk, and add it to the skillet.
  • Stir well and turn off the heat.
  • Drain the pasta. Do not rinse! You want the pasta tacky to grab the sauce.

Service- Place a serving of needles in a shallow bowl or plate. Spoon meat mixture over the noodles. Sprinkle chopped oregano on top. Serve with a green salad and crusty bread.

While most recipes do not call for garlic, nor paprika, nor (God forbid) Oregano, I find this version more flavorful. They add extra notes of savoriness what is normally a bland entree.
Enjoy!

Y'all have a blessed day!
Cockeyed Jo


Sunday, September 15, 2019

The Cockeyed Garden Again

Now that I've regained some of my energy from my July fiasco, I noticed some green poking through the landscape barrier cloth in the garden. Maybe, we should have used black plastic here too.

As Two Women and One Hoe points out, weeds continue to grow underneath and on top of it. But I was thinking buried under a foot of wood chips, and then the landscape fabric would work and save energy.  We wouldn't have to aerate the soil or water it.When organically growing a garden, you use what nature gives you. You use the compost, wood chip, hay, and nonsprayed hay to do the work for you. The blackness of the fabric retains heat of the composting material and the sun.  But it also needs moisture to work properly. I should have known better.

The weeds grew through two feet of wood chips and another foot of organic material (composting chicken and rabbit manure) and dying weeds would work. No, but Mel's weeds are super strong. They are even growing THROUGH the gravel in our driveway.  These are almost impossible to pull up without pulling up destroying the driveway. It's 2" of coarse grade rock and 8" of finer compacted gravel. Yes, some are growing on top of all that gravel, but those are shallow rooted and easy to pull.


So this week, I've been pulling and snipping weeds in the garden taking frequent breaks. UGH! Just what I was trying to avoid. But, my incisions have healed nicely and my strength is getting better. The weather is cooler so it's not sweltering outside, but I'm still sweating from the exertion. If I don't get them now, it will undermine all of our garden starting from scratch again efforts.

What's a homesteader to do otherwise? We can't afford a busted garden year next spring. The stores pickings will be almost empty by then. The idea of being like city folks again and buying everything, is an abhorrent thought! Especially when I know, there's at least two feet of rich, organic soil there to plant in. No,no, no, perish the thought! All those chemicals, waxes, and oils, no thank you. I'll go back to planting in pots before I do that.

I'm not opposed to pots, mind you if that's all you can do. But, when you've got almost got a little less than 1/2 an acre of growing space of rich organic soil, why would you? The only thing we plant in pots are the not cold hardy plants like our ginger and turmeric, and citrus trees, or starting seeds. Even then, we are using our own soil and compost to grow them in. Can you imagine how many pots we'd need to grow enough to be self sufficient? Besides the cost of the pots, it's impractical not to mention insane. I'd be watering constantly.

So I'll continue to pull weeds when I see them. They'll eventually go dormant.

Y'all have a blessed day.
Cockeyed Jo

Wednesday, September 11, 2019

Cooking with Chef Jo: Jalapeno Cornbread

With the weather getting cooler, I want something good and perfect to match the weather. On tonight's menu is Chili, and Cheddar and Jalapeno cornbread. I'll bring y'all along for the ride. I'm making a bit pot of chili so I can can the leftovers. I'm down to three jars in my stores building. EEK! I usually don't let it get that low.

 You can find my chili con carne recipe here. It has tons of protein. I'm cooking the same way but doubling the recipe.

Today I'm highlighting the Jalapeno cornbread recipe. If you look at the upper left side of the picture, you'll see the cornbread.

Jo's Jalapeno Cheddar Cornbread
Serves 8
What you'll need


3/4 cup butter, use the real stuff for the best flavor
1/3 cup sugar
3 large eggs, room or chicken temperature, beaten well
1-1/2 cup buttermilk, or use 1 cup whole milk plus 1 tsp white vinegar
1/2 teaspoon baking soda 
1 tsp baking powder
                                                             1-1/2 cup all-purpose flour
                                                             1-1/2 cup yellow cornmeal*
                                                             1/4 cup jalapeño pepper, fine diced
                                                             1/4 cup of cooked corn, whole corn, drained well
                                                             1/4 cup onion, fine diced
                                                             1/2 teaspoon salt 
                                                             1/2 cup sharp cheddar cheese, shredded
                                                           
                                                            A  12" cast iron skillet.

* I'm originally from the middle states. Cornmeal is yellow not white. If all you have is white, then use it.
 
Putting it all together

  • Coat onions, pepper and corn in flour. Set aside. This will prevent them from sinking to the bottom of the pan while baking.
  • After you've mixed the milk and vinegar, if you don't have buttermilk, let this mixture sit for 15 minutes.
  • I like to mix my dry mix into the liquid on. Just the opposite of everyone else in the world. That's just the way I roll...cockeyed. Pour your buttermilk, and beaten eggs. Mix well to combine.
  • I place my butter into the skillet and place it in my oven while it preheats to 400 degrees. I use the melted butter to both grease my pan and add it to my batter.
  • Add the sifted dry ingredients to the wet in 1/3s. At each addition pour in melted butter. One or two stirs should roughly combine.
  • Continue to add dry to wet ingredients until the flour mix is gone. You still have a roughly combined mix.
  • Add your floured corn, jalapeno, and onion to the cornbread mixture. Again, stir twice to incorporate.
  • Pour cornbread mixture into the hot skillet.
  • Bake 400 degrees for 15-20 minutes until done.
  • Slather more melted on the top and on the bottom when plated.
 
I can eat this all by itself anytime, anywhere.For me, it has enough of a moist buttery flavor at this point, but I always add a couple pats of butter to Mel's plate of food. Leftovers? We usually eat two pieces and eat the rest with leftover chili.
I pressure can the leftover chili, but not the cornbread. It's easy enough to make a fresh batch.
 
It's surely yummy for your tummy! Enjoy!
 
Y'all have a blessed day!
Cockeyed Jo

Sunday, September 8, 2019

Cooking with Chef Jo: Chicken with Mock Alfredo Sauce Over Egg Noodles

This is one of my pantry staple recipe. My go-to recipe when I've forgotten to take something out of freezer. When we had the big, chest freezer full of meats, I'd pull a week's worth of meat each Sunday.

Now, I'm not doing the shopping, I'm left to create with whatever meat is in the marked down bin. Mel buys enough for a week's worth of meals which ends up costing more to the tune of $500 a month.

Compared to me. I used to shop for the month, keep an eye out for bargains, and my bottom line. My budget was $300 a month buying in bulk if possible. If I spent under that amount, I stockpiled things like paper goods, extra meat, or hoard the cash away it away for my trips to Amish country for grain goods like flour, wheat, oatmeal, corn meal, clearjel, and sugar. I will spend approximately $400 per trip, and two tanks of gas, but I'd buy enough for a year or more. I always bought non GMO, and heritage, and/or organic where possible.

Now that I've explained all of that, variety is the spice of life. Good tasty meals are a must for me. So to get that option, I'm pulling from my precanned stores to get it. With that in mind, I decided to share my Chicken with Mock Alfredo Sauce over Noodles with y;all.

All this is from my stores building, but I'll add regular equivalents for y'all non-canning nor non food storage folks.

Chicken Mock* Alfredo Sauce over Egg Noodles
Serves 4
What you'll need

1 pint of of canned, grilled chicken*, or 1 lb of cooked chicken, shredded or diced
1 pint cream of mushroom soup, undiluted,* or 1 can of cream of mushroom soup, if using store bought cream of mushroom soup add 1 small tin of drained stems and pieces mushrooms, or use 4 TBS rehydrated dried mushrooms, chopped.
1 small onions, small dice
2 stalks of celery, small diced
4 cloves of garlic, minced
1/2 cup Parmesan cheese
                                           1/4 cup milk
                                            2 TBS butter
                                            1 lb wide egg noodles*
                                            2 tsp fresh or 1 tsp dried oregano
                                            Salt and pepper to taste

Notes*- Regular Alfredo sauce calls for heavy cream, parsley and twice as much Parmesan cheese. This is a lighter version, but just as tasty.
I parcook my chicken over charcoal, dice it into 2" pieces. I then fill the hot jars with 1 cup of chicken bone broth and 1/2 tsp salt before adding my chicken pieces, and pressure can them.
When I make my cream of mushroom soup, I dice my mushrooms, cook them in butter before I add them to my soup base so there are chunks of mushrooms and half and half in my version of cream of mushroom soup.
My mushroom soup is thick like store bought canned soup.
I make my own whole wheat noodles, dry, and store them for three to six months worth at a time.

Putting it all together
  • Place onions, celery and garlic with 1 TBS of butter in a 2 qt sauce pan. Cook until onions are translucent (fully cooked).
  • Add drained canned chicken, reserve the liquid.
  • Add cream of mushroom soup. 
  • Add the oregano.
  • Turn your burner down to low.Stirring occasionally.
  • Cook your egg noodles to al dente. They will be slightly firm to bite into. Simply subtract recommended cooking time by two minutes.
  • Add the Parmesan cheese into the chicken mixture. Stir well and turn off the heat. 
  • If too thick like custard, stir in some of the reserved chicken liquid. You want it to coat the back of the spoon. The mixture will continue to thicken as the cheese melts and cools.
  • Drain the pasta. place the remaining TBS of butter to the hot pot. Add the drained pasta into the butter. Toss the pasta to coat it in butter.
  • When the cheese is melted (slightly stringy), the chicken sauce is done.
Service- there are two schools of thought when it comes to serving pasta dishes. The first one is dish the pasta into servings and top with the sauce. The other one calls for mixing the pasta and sauce together, then serving. To each their own preference. I like it both ways. With the first choice, each element holds their own flavors and combine on your taste buds. The second is a more harmonious blending of all flavors.

Top each plate with more Parmesan cheese and oregano, and serve. I love to serve this dish with English peas or green beans, and a garden salad with a homemade Italian vinaigrette.

As for the leftover chicken bone broth, I'll save it for part of the liquid to cook rice, or give it as a treat to the cats, or pour it over th evening meal for the dogs as an extra protein boost for the animals.

Enjoy!

Y'all have a blessed day!
Cockeyed Jo


Demolishing the Store Building ...Sort Of

Rats had totally infested our stores building this summer. They were having a grand old time nesting, eating, and just squatting in there. Nothing we tried worked. We even resorted to poisons and it made a small dent in the population, but the destruction continued. The smell was so gross that even Mel had trouble breathing in there. Every week, we'd sweep out two or three dustpans full of droppings every week. They would knock canning jars off the shelves to pop the seals, and eat the contents. Every week jars of jams, jellies and other things I'd painstakingly put up were gobbled down equaling 3 jars a week. Added to the high humidity causing white mold to form over everything. Something had to give. Thanks for all the suggestions via newsletter subscribers.

We took everything out of the stores building. Think several hundred jars and shelves. It ain't a tiny building at 10'x 12'. All the jars and buckets were washed down with bleach water. The shelves included, were we ever glad that I bought metal and plastic shelves to go in there instead of building them in. They were so much easier to clean.We trashed 25 lbs of flour and sugar because the rats had chewed through the buckets.

Next came the demolition weeks two and three. We pulled each of the hand painted panels and fiberglass insulation. The insulation was the worst. Yes, we wore gloves, masks and took frequent breaks for this part. The whole process took the better part of two weeks just to do this. The indoor/outdoor carpets that we use in the back porch during winter protected the jars from the light while we worked and deterred the chickens from pecking at the jars. I'd forgotten how much insulation was actually in that building, but it was all shredded and messed up. Eight big, black trash bags full. Instead of one trip to the dump every three to six months became two trips in one month.

I read that rock wool insulation will deter rats and they won't set up house in it. At $700 worth for the building, it will be a while before we can insulate it again. Then there is the paneling. We may be using pallet wood boards for that or cheap, thin plywood. It'll mean a small space heater in the building to keep it from freezing this winter. Maybe, even turning on the air conditioner in spring and summer depending on how long it takes to buy the materials needed for this job. There will also be no place for the rats to hide with bare outside walls and framing inside. I wonder what the R value is of steel wool? I know they don't like that. It hurts their little mouths when they try to chew through it. Awww!

Anyhow, we'll be resealing all gaps after we wash the inside walls with bleach, water, and essential oils (rosemary, peppermint, cinnamon, and cedar wood) to erase the urine trails. The oils will only work in the short term. About every three months I'll be spraying the room with a water and essential oils mixture because mice, rats, and most insects hate the smell.  Every couple of months should do. I'm determined to not have this problem again.

Mel was thinking of trashing the contents of all the jars. I told her no! White mold is only on the outside of the jars. The rust on the lids is on the edges and some on top. While washing the jars, she checked the seals and scrubbed them with a ScotchBrite pad, bleach, and Dawn. It remove all the rust and mold. She only trashed the jars that had the seal pop (none did) or had signs of spoilage. The inside contents were still good with no signs of spoilage (3 jars).

Now when I go to use the jars, I'll wash them the same way. Instead of using the lid to strain the liquid off the vegetable, I'll pour it into a colander to be sure we don't get any residual rust in my food. I'll check the interior of the lid. If rust is present beyond the edges, it goes into the trash. I'll do the seal pop, smell, and boil for 5 minutes for cooking. Just to be safe. I don't want to poison myself or others. In fact, I do this with all home canned food.

So that's the plan. This was a three-week job with all the breaks.

Y'all have a blessed day!
Cockeyed Jo


Wednesday, September 4, 2019

Cooking with Chef Jo: Canning Tomatoes and Sauce

With the garden providing bupkis this year, the decision was made to buy roma tomatoes from the local produce market. Our local farmer's market didn't have the quantity I needed. Although they are my first choice because they are chemical free. It's not ideal, but I'm down to two jars of salsa and one jar of diced tomatoes. EEK! It was the one vegetable that we went through in a year that I estimated right. WTG! or unfortunate with the garden failure.

I figured two bushels would carry us through until we could harvest next year. One bushel for sauce and diced for the other one. I put both bushels in the freezer after washing them twice, cutting out any bad/unpretty spots, and coring them. They've now been frozen for two weeks and it's time to get busy! I start with the sauce tomatoes. There is a method to my Murphey Madness.

Canning tomato sauce in pint jars...

What you'll need
1 Bushel Roma tomatoes, cored and frozen. A bushel of tomatoes weighs 56 lbs. I'll be making about a year's worth of sauce.
Canning salt, or Sea salt, or Kosher salt*

3 lbs onions, large dice (1" to 2")
1 head of celery, large dice (1" to 2")
1 head of garlic, minced
Italian seasoning*
2 TBS olive oil
1 1/2 cup apple cider vinegar (ACV)*

A stick or immersion blender, or blender
Stock pot(s)
Water bath canner or pressure canner
Jars, lids, and rings
colander
large basin to catch the tomato water
knife

Notes*- I put Italian seasoning into all my tomato sauce recipes no matter what I'm cooking. I also dehydrate my own homegrown herbs and make my own spice blend. So I'm making this an optional addition. For the salt I measure 1/2 tsp per jar for pints 1 tsp qt jars). The apple cider vinegar raises the PH of the sauce so even with low acid herbs, onions, and celery, it can still be water bath canned. Even though the FDA does not recommend it, but I've been doing it for decades.

Putting it together
  • Place from cored tomatoes in a colander over a bowl. Allow tomatoes to partially thaw.
  • Slice tomatoes into quarters and gently squeeze each quarter to remove the excess water. Save the liquid in the drain bowl from thawing. This will reduce the cooking time.
  • Notice I didn't remove the skins nor seeds from the tomatoes. There's a lot of flavor and color in those seeds and skins.
  • Place oil in your stock pot. Add onions and celery. If you like bell peppers you can add them too. Cook until tender. Add Italian seasoning, garlic, and ACV to the pot. If you are cooking this in several pots, divide vegetables evenly in each pot.
  • Add the quartered tomatoes to the pot. Let simmer for an hour. Stirring occasionally to keep it from burning on the bottom of the pot.
  • Turn off the heat. Let sit for an hour. After that time, the heavier sauce will sink and the thinner "sauce" will float on top. You can skim this top part off for tomato juice later. 
  • Take this thin juice and add grated carrots, and ginger root, cooking it until the new vegetables softened, blend it smooth, and you've made a mock of V-8 juice. 
  • Leave only the thicker sauce in the pot.
  • Using your immersion blender, puree the thicker sauce until it's as smooth as you want it. I tend to make mine leaving some chunkier bits in there. The sauce may appear thin, but it will thicken as it cools.
  • Ladle into hot jars, add 1/2 tsp salt, wipe the edges, tighten the ring, and place in the water bath canner.
  • Process 40 minutes for pints, 60 minutes for qts.
Now why did I tell you to save all the liquid while thawing and squeezing? That's coming up.

Canned whole or diced tomatoes...

What you'll need
A bowl for the skins for feeding them to the chickens and the compost pile.
1 bushel of tomatoes, frozen. Romas fit whole so nicely into the jars without having to cut them.
Canning salt, or Sea salt, or Kosher salt*
Leftover tomato water

Canning jars, lid, rings
Water bath canner
colander
knife

Putting it together
  • Place tomatoes in colander to thaw
  • Peel the tomatoes. They should easily slip their skins while thawing.
  • Place 1/2 tsp salt in each clean jars
  • Cut tomatoes into desired diced size, I usually cut them into 8 pieces and cut them smaller when using them. Fill the jars with the tomato water liquid to 1" head space. Most recipes call for using hot water, but why waste all those vitamins and minerals?
  • For whole tomatoes just stack them in the jars and press to expel the liquid. I've found that the water expelled when pressed gives you the 1" head space.  If not, fill with tomato water. You will have to add more whole tomatoes after pressing.
  • Place jars in the water bath canner. Process 30 minutes.
The net from all of this canning, 50 pints of tomato sauce, 27 pints of diced tomatoes, and 27 jars of whole tomatoes. As an added bonus, 10 pints of mock V-8 juice.

When serving diced tomatoes as a side dish, mix a TBS of corn starch with the liquid. As it cooks it will thicken into a "gravy." Why waste those vitamins and minerals pouring them down the drain! Waste not, want not.

Enjoy for months to come.

Y'all have a blessed day!
Cockeyed Jo

Sunday, September 1, 2019

Fall is Here

Suddenly overnight, Fall has fallen. Right on time the 23rd of August for a change. We went from 90 plus temperatures to highs in the 70s. The daily rains have a lot to do with that. The leaves are changing colors and falling all over the place which is a good thing for an organic gardens like ours for composting.

Part of the problem is that I've spent since April, in and out of the hospital and recovering from this or that surgery or injuries. I'm  still not done yet. The upcoming cancer surgery and treatments are still left to do. It's been a bad year for the both of us at the Cockeyed Homestead medically speaking. It's got us down to one vehicle and away from the homestead for the most part for most of Spring and Summer.

With the cooler temperatures, come thoughts of the coming winter. The plans  were to lay in a cord of firewood a month for the colder months ahead during summer (buying 1/2 a cord and cutting another 1/2 a cord from our property) each month. Well, that didn't happen. All that went to hospital and pharmacy bills. We just have not felt well enough nor been here to tend to this yearly issue.So we're stuck with buying most of our firewood again, our only source of heat, for the homestead. It's a big ouchie when it comes out of our pockets each month. Last year, we went through five full cords of wood. Which isn't that bad but that's up from three in previous years. At $300 a cord, a month, runs into a big chunk of change. Still, it's cheaper than heating with gas or electric. In other places in the country, a cord of wood runs $500 to $700 so in that respect we're luckier than most.

With the garden and orchard for the most part put to bed until spring, there's little for us to do besides tend to the animals. With the deaths of so many hens and rabbits this year, the workload has decreased significantly. But there's always spinning and knitting to do for me. It's just too hot here to even think about messing with wool and fiber during the summer. We've harvested three seasons worth of angora fiber and other fiber to spin to make into yarn. 3-10 ozs of fiber, and every three months times nine rabbits, you do the math. Plus the purchases of a fleece of alpaca and merino wool for blending with the angora. Adding to this is the two fleeces of other wool, I suint cleaned this spring. I've got my cooler weather activities cut out for me once I'm no longer radioactive, 28 days worth.

I love the suint method of cleaning sheep's wool! It;s a no brainer method of cleaning wool. No fussing with temperature changes of the water and very little labor. It does have a smell, but if you've ever washed whole fleeces the other way,  this is so much simpler.

The steps...
  • Find a container with a lid big enough to hold your raw fleece. I use the 55-gallon tote from Lowe's ($15) does two whole fleeces at a time.
  • Enough rain water to soak and cover the fleece by 4". We harvest rain water with our rain water catchment system in 400-gallon containers for flushing toilets, watering our animals, and gardening efforts.
  • A piece of plastic big enough to cover your tub.
  • A weight to hold the wool down, I use washed rocks from our creek. But a couple of ironstone plates that you care nothing about will work too.
  • Cover. and let sit for two weeks in a shady location to let ferment. For subsequent batches using the same stinky water only one week is needed. I'll so several batches adding more rain water as needed.
  • Fish the wool out of the tub. This is the stinky part. I do strongly suggest dish washing gloves. A long handled colander is also helpful in scooping out the little bits. The wool will still look grungy.
  • I place 1/2 the wool into another tub. Rinse the wool in copious supply of rain water. Gentle press the wool under the water a couple of times, let sit a couple of minutes and repeat. Empty the rinse water, press then the fleece to remove as much of the water as possible and refill the tub.Within three rinses, the water will run clear and the wool will be clean. The smell will almost be gone. I do add a cap full (about 2 tsp worth) of original Dawn to the second rinse just because.
  • Place the clean wool out to dry in a sunny location to dry. I stretch out a flat, queen sized sheet over the rails on the deck. This way it keeps the dogs, cats, and chickens out of it while it dries. The fermented suint smell is gone after it dries.
  • Then just bag it up for carding, selling or spinning, or ready to use.
Although this method takes longer, it's maintains the locks better. Even the rough tips are gone without extra work. All the organic debris is gone. No clumps of feces nor lanolin are in the cleaned fleece. The lanolin and rain water make the "soap" and the fermenting process breaks down the debris  works as a fabric softener. There may be bits of hay or straw left in your wool but that is easily removed picking your wool or carding it.

So around here, we're doing our cooler weather transition. We are moving back inside. The television and DVD player are connected in the living room again. Are we ever glad for flat screens.The plastic on the screens are rolled down and locked into place. The back porch changes back into a greenhouse until next summer.

It's our purposeful transitions for the seasons...

Ecclesiastes 3:1-8 American Standard Version (ASV)

"3 For everything there is a season, and a time for every [a]purpose under heaven: a time to be born, and a time to die; a time to plant, and a time to pluck up that which is planted; a time to kill, and a time to heal; a time to break down, and a time to build up; a time to weep, and a time to laugh; a time to mourn, and a time to dance; a time to cast away stones, and a time to gather stones together; a time to embrace, and a time to refrain from embracing; a time to seek, and a time to lose; a time to keep, and a time to cast away; a time to rend, and a time to sew; a time to keep silence, and a time to speak; a time to love, and a time to hate; a time for war, and a time for peace."

Y'all have a blessed day!
Cockeyed Jo