Our Mission

To live a self-sufficient and organic lifestyle for the next half century. With the Grace of God and the power of prayer, we will succeed. Nothing is impossible with His help. It wouldn't be us without laughter and joy at the Cockeyed Homestead.

Find out more about our homestead on these pages

Showing posts with label income. Show all posts

Wednesday, March 24, 2021

Crafting with Jo: Upcycling Plastic bottles

I've talked quite a bit about what we sell at the Farmers Market. Since we started herb seeds and grow our own herbs to propagate, there is an abundance of herbs to choose from. Now that it's getting warmer, I'm thinking more towards collections of herbs such as salsas, Italian, Mediterranean, and first-aid.  Lord knows, there's almost an unlimited supply of pop bottles in a variety of different sizes available in the trash cans to work with. I've also acquired a lot of different color sprays and tubes that have been leftover from this or that project so cost should be almost nil. Plus the other vendors are saving theirs for me too.

Now I could just paint some 5-gallon buckets or maybe keep it small. Imagine a first aid caterpillar like this one on the left creeping along a window sill, patio, or balcony. How stinking cute is that? It can be made from plastic drink bottles of varying sizes from single serve to liter bottles. I will have to go to the Dollar Tree for some pipe cleaners to make them though.

How about a 5-gallon bucket with a Mexican stencil design painted on it with cherry tomatoes, onions, hot peppers, and cilantro for a salsa garden pot? Like this one? The pots are usually free at any grocery store bakery or deli operation. Using bright primary colors would make it pop. The nice thing about stencils is that they can be used over and over again. Just change the colors up for variety.

Plant starts and planters have been hot sellers (not to mention the eggs) for us. Everyone, it seems, is jumping on the plant-your-own bandwagon in these uncertain times from apartment dwellers to urbanites. Why have something ordinary when you can have something extraordinary and multifunctional. That's been my mantra for decades. It seems our buyers agree with me. Every little bit helps. It doesn't hurt that we'll be selling transplants to go into the pots too for return business next time around. Just in case they have a brown thumb. 😄

So what do you think? It keeps me busy and happy while watching my garden grow. What have you tried at your booths?

Y'all have a blessed day!
Cockeyed Jo


Sunday, March 21, 2021

Farmers Market Report


 The spring like weather brought people out in "droves." Now keep in mind that ours is a small, rural county with just less than 3K folks and a traffic jam is five cars ahead of you in the turn lane. Our farmers market isn't huge by any stretch of the imagination, yesterday's count was 10 tents, but still the twenty-five folks that stopped by our tent, we considered it a successful day because all twenty-five purchased from us.

What we took and sold...
  • Two flats of cabbage, lettuce, broccoli/cauliflower/Brussel sprouts and 3 pots of of preplanted carrots (19 carrots in each. We sold them all.
  • Four preplanted cutesy recycled soda bottles of rosemary and oregano. We sold them all.
  • Eight dozen free range eggs. We'd brought ten. Mel also handed out contact cards for future sales.
  • Four kitty cat planting pots made from recycled vinegar bottles and one donkey planter fill with pansies. Leaving one kitty planter, five puppies, five piggies, five chickens to take home.
  • People were fascinated by my spinning plan. Like the commenter last week, they'd never seen it spun before. They liked the product after fingering it imagining how it would feel to work with. This sold 8 skeins of tan, gray, and white plarn out of the twenty we brought and two I'd made there.
  • But from this demonstration, it also sold three medium size and one large market bags our of the ten we carried with us. Mel was crocheting one in between helping customers.
So all in all, it wasn't a shoddy day. We had four hours in the sunshine, interacting with people, getting to see our friends (other vendors)and Sold quite a bit that we'd brought.  I connected with my certified organic grower friend of years past and we swapped some seeds to start for summer. He grows a ton of different peppers and Asian eggplant each year that I buy each year. But then, he's got twenty acres on his farm too.

I'm also thinking of next year's market. When we finish one of the tiny houses, I get it inspected and the certification for selling pickles and jams. Another source of revenue for this homestead. Lord knows, we've been blessed as far as fruits grow that we've planted or grow wild one our property to provide a few jars to sell. I know all about the prep area inspections from working in restaurants. Cukes and other vegetables don't take that much space. Each fall, I make ten gallons of apple cider vinegar to start with. We made enough to cover our costs and our membership fee for the market for the year from this one day too. Our cash expenditures to make to sell the items were minimal just some paint and time.

Y'all have a blessed day!
Cockeyed Jo

Sunday, March 14, 2021

Garden/Market Ho!

We've got lift off or at least germination in our soil plugs. It's so exciting!! Many seedlings have their first leaves already thanks to a jump start I gave them that I found on YouTube. Actually, I've done this before with fruit trees, but not with vegetables before.

The jump start is soaking the seeds for at least 8 hours. They swell making them much easier to pick up and place on a damp paper towel. I put them in labeled baggies and let them sprout first, and then planted the sprouts in my seed starting mix (50% peat, 40% perlite, &10% compost) . Total time was one week Even long to germinate carrots are showing their first leaves! I was amazed because usually it take 2-3 weeks for them to reach this stage.

The plastic wrap came off the trays today and I turned on the grow lights. I positioned the lights (via the chains) to one foot away from the plants. By the germination-seedling rate, we should have a pretty good garden this year... if the weather cooperates.

Years ago I showed y'all how I made my soil block maker, didn't I? Yes, I did. It's here. I used my empty pill bottles that are 2" in diameter. I've since that time, made several of them. I can make six of them (3x2 layout) at a time. I tried a 4x2 layout but my hand wasn't big enough to make eight uniform blocks so I adapted the design to this. I connected them together with paint stirrer sticks. The double layer makes it sturdy. I simply drilled a hole in them and used a washer and nut to attach it. My hand easily stretches across the top bar to push it. I had perfect 2"x 3" soil blocks. Heck with paying $36 for a metal one. It's bad enough that I have to pay for my drugs every quarter (because I HAVE to have them), but sending all those plastic bottles to the landfill should be a crime. The 2" size will allow growth until several true leaves form. Then, the plants can go into the ground or container with ease. No pots to unmold or tear, just dig a hole and plop them in.

We're off to a good start for the spring garden and for selling transplants at the farmers market in two weeks. The market was very, very slow last yesterday. I blame it on the cooler temperatures and the rain.  Next Saturday will tell the tale it's supposed to be in the 60s and no rain.

Y'all have a blessed day!
Cockeyed Jo

Sunday, March 7, 2021

Crafting with Jo: Gearing up for the Farmers Market Season


Last year we couldn't participate in the Farmers Market because of the COVID scare and lockdowns. We continued to craft and build up supplies. Our local market operates from next week through the beginning of August and is open between 8AM to noon on Saturdays. It's about fifteen miles from our homestead.

We got our required 10x10 pop up tent at an end of the season sale. Folding chairs we had. A table was fashioned and painted using a discarded folding table base from the dump. It was missing a top which Mel made out of scrap pallets. It looks very rustic which was the look we were going for.

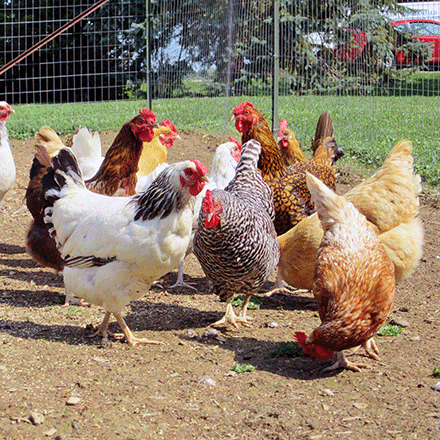
We decided to invest the $100 fee which is no small hardship for us, Not that our local Farmers Market is that busy, but it would provide contacts for future eggs sales. We really were undecided after losing half of our free ranging hens to dogs an coyotes over the past few months. Now, we get a dozen eggs a day from our hens. If response is good, then we'll buy new hens to supply customers with farm, free range eggs. If there is any doubt about the chickens being free range, I've got pictures of Mel chasing them out of our living room and laying eggs in our back porch that two of them favor, and roosting on our front porch railing. There's little doubt that the flock is free ranging to any visitors we've had. They've been greeted by the chickens and dogs before we can get outside.

I've started four 36-cell trays with herbs vegetables, and flowers to sell a month ago. I've crafted small herb "dish" gardens and pots to sell out of upcycled containers. We've got some cut, fresh herbs to sell ( rosemary, sage, thyme, and oregano). We'll add to the list as the annuals grow. Our market is chemical- free and only home grown produce. Unlike other farmers markets, no wholesale produce is sold. A yearly inspection of farms in the co-op keeps it that way in the truest sense of the words. Even the inspectors operations are checked to maintain the locally grown, chemical-free guidelines of the market.

The baskets, boxed, and cups that came with vegetable and fruit purchases over the last three years have been dusted off and been given a new lease on life to display our wares. An old cube storages rack now will be loaded with plants while another 9-bin cube rack will feature homestead made objects. I'll be carrying our Traveler spinning wheel and plastic yarn (plarn) to spin into worsted weight plarn as an attention grabber. Meanwhile, a Command hooks on one of the cube storage racks will hold market shopping bags (we've made) for sale. One of the cubicles of the homestead made products will hold 350-yard skeins of plarn to sold. This will sit on two ice chests gilled with eggs. It takes a minimum of 2 skeins of plarn to make a 12"x12" sized tote. Mel crocheted some while I knitted some. I made some copies of the patterns we used as a bonus. This pretty much fills our table and tent.

Our total expense including our membership fee should be met within a few short Saturdays. I've spent the last three years talking to most of the regular vendors and watching the traffic flow through the market. The busiest time id either the first hour or the last hour. We may have to build another table with boards and a saw horses, but that remains to be seem. For our first venture, I'm thinking no more than ten of each item. I may change my mind. If we sell out the first Saturday, we'll change tactics the next. It will be a good thing to sell out. Mel will have a notebook for items for people to orders for the following weekend pick up. Anyhow that's the plan. Wish us luck! After all, one man's trash is another one's treasure, right?

Y'all have a blessed day!
Cockeyed Jo

Sunday, August 2, 2020

Picking Peaches

Ah, yes. It's summertime. When you can take a break from working outside, get a drink, and sit in the shade. That first sip of iced tea sizzles down your throat and into your stomach. It makes an almost audible hissing sound as it travels down.

About eight years ago, Mel watched a Youtube video about how to grow fruit trees from seeds. She started three peach, an apple, and a lemon tree seeds from produce she had purchased from the store. As they grew into quart, then three gallon sized containers, she began thinking of where she'd plant them. She decided to leave the lemon tree in the greenhouse because of the cold winters. She planted the apple tree out where the
Three peach trees in our garden.
orchard is now. It was later killed by the Bobcat when we terraced the orchard. The three peach trees were planted at the edge of the new side driveway. The garden didn't stretch as far as it does now. It was only for a year so she could move them when she figured out where she wanted them to go.

Fast forward five years, we now have an orchard area to plant the peaches in, but the peach trees have gotten so large we can't move them easily. She did top them off so the main trunk only reaches five foot. All three are planted together in a clump with barely a foot between the main trunks. Up until this year, all the peaches either fell prey to insects or squirrels. So, we never even tasted them.

This year was different. In spite of Mother Nature sending cold weather until June, we have an abundance of peaches that even the bugs, squirrels, and birds couldn't consume them all. They are smaller than usual, between a golf and tennis ball size, and quite tart. Yes, we finally got to taste our peaches!


It would probably take ten of them sliced to fill a pint sized jar with peaches. Currently, only one of the three trees have ripe fruit. The other two are loaded with green peaches. So we'd have no shortage of them if I wanted to do that. I haven't done anything in the way of fertilizer or cared for these trees in the five years I've been here. I didn't see the since in wasting my time and resources with these trees if we weren't getting anything from them. For five years, I've held off moving the trees or removing them out of my garden. But surprise, surprise! We have a bumper crop this year. So I'll be fertilizing them this year. Actually, we decided to take the smallest one out so the other two would have a better chance. We are seriously talking about moving them down to the orchard if next year's produce is larger and sweeter...if not all three will be cut down and we'll start over.

So what am I doing with all these tart little peaches? Well, I've been picking them. I've been dicing them up for jams and jellies. I've even halved some for cobblers and pie filling. All these things have loads of sugar added to them so the peaches being tart is a mute point. I will say our little peaches are packed with a great peachy flavor. It's a case that we've been gifted these peaches to harvest. It was totally unexpected. So as usual, it's waste not, want not, and see where it goes.

How to make money with just some ingenuity and a little bit of time? The year was 1991, I was a single mother, working my way through college with five children underfoot. I'd pick up cull peaches for free from other vendors. They were too bruised or weren't pretty enough to sell. The next week I'd have more peach jam to sell. Not to be out done, my children picked up corn husks and silk from other vendors. They made corn husk dolls and corn husk refrigerator magnets to sell too.

 What better way to serve a "Little bit of Georgia in every bite!" This is the tag line I came up with when I sold my peach jam at the farmers market. Tourist's snatched them up by the case load. Soon, other vendors offered to sell our wares for a percentage and I didn't have to get a stall at the market anymore. I just delivered 20 cases of jam to the vendor before the market opened and settled up after it closed. I also picked up their culled peaches. By the time the market closed down in October, I'd made enough money for my textbooks for two semesters, and my children had saved enough money for their own back to school supplies. How's that for cents making sense?

Y'all have a blessed day!
Cockeyed Jo

Wednesday, March 11, 2020

Crafting with Jo: Project Garbage to Treasures For Sale

I'm taking a break from "Cooking with Chef Jo" today to bring you a crafting segment. We do pretty well about upcycling our garbage for our own personal use and for sale like our plarn made from plastic bags and coverings. In reality, we generate about 6 trashcans of garbage (2-3 tall kitchen bags per can) that goes to the landfill every 3 or 4 months. If you are looking at your own garbage picked up weekly, and saying "Wow!"Here everything else is recycled or composted.

Well for 2020, we are facing financial set backs like car payments and growing Mel's poultry farm. So to combat this, we're looking at our garbage. One man's trash is another man's treasures. With a few tweaks towards reinvention and beautification, we'll make items to sell.

Now that our feed storage room is built into the barn workshop, we have a small stack of empty feed sacks just lying around. We used them as weather barrier in the walls, ceiling, and floor. It held in all the Styrofoam, peanuts, bubble wrap, and air pillows for insulation between 2 layers of feed sacks. The building was basically a free build for an 8x12 building. Now, it houses bulk 50 lb sack of chicken grains and seeds, rabbit food, cat and dog dry food. After a year, there are no signs of rats or any other critters in that room. On the top of this room, 50 lb bales of orchard grass bales are kept. We go in and mix up trashcan loads of chicken feed and carry it out to the chicken area.

But since that project was completed, we haven't used any feed sacks so they've just been gathering dust. We've used some to store sifted compost, or rabbit manure, or wood ash for dust bathing for the birds, making lye, or for the garden. But even so, we generate 4-5 bags a month.

I got to thinking of those tote bags. Some of them are stinking cute and go for a medium price ($12 each) on etsy and farmer's markets. I can do that! A few cuts and straight seams and you've got a tote bag for sale. Easy peasy, lemon squeezy. Money in the bank from garbage! Add my knitted plarn market totes...cha-ching! The plarn was made from grocery bags and packaging.

I started looking at other things most people put in the trash. Empty, single serve, plastic water or drink bottles, bleach, milk jugs, vinegar bottles, etc. How about converting them into planters. We were already thinking about selling plant starts at the farmer's market. How cute are these? Although, I was mainly thinking herbs. Imagine Catmint or catnip in a kitty cat one or watercress in a frog. YouTube, Pinterest, and the internet in general are full of ideas. Of course, these herbs will sell for a premium of $6 extra for the pot (16 oz bottle size) and plant. Money from garbage and it keeps it out of the landfills where it'll take 700 years to decompose. A double win for us.

We actually don't use too many plastic products. I may have to hit my neighbors up for theirs. <GRIN>

Made from empty jar
Empty jars and cans can get a whole new life too. The little geisha is made from an empty coffee jar with paint, a napkin, a plastic cup, a used tennis ball, and a bead. It's still a usable container. Can you imagine it refilled with rice cracker snacks, or tea. Just on it's own empty, it's a work of art. All from a jar you'd throw in the trash.  I'm definitely making a couple of these for me. This little gal would sell for $10 easily!

You can recycle these items into sewing kits, canisters, jewelry boxes, etc all from trash. Don't even get me started on cardboard recycling besides in my garden!

So I've got my work cut out for me. Let's see if I can't make those six garbage cans hit the landfill every six months while it pads our wallets. Speaking of which, the trash haul costs us only $6 a trip. How much does your trash service charge you? Meanwhile, Mel is creating farm decor signs and organizers out of pallets, and creating her version of bullet journals.

🎵A crafting we will go, a crafting we will go. High Ho the glue sticks go. A crafting we will go to make our pockets grow.🎵

Y'all have  a blessed day!
Cockeyed Jo

Sunday, February 16, 2020

The Babies are in the Coop, Now What?

4-week old chick before the move
The chickie babies are happily moved into their coop.  Next week, we'll allow them to check out outside. It should be interesting watching them explore their new territory. We wanted to teach them where home is first. They are still small so we don't expect them to explore their full 25' run this week, but we've got several independent, adventurous chicken that may. As we've learned, the rest will follow in the coming weeks. The days are still short and cold so it will deter them a bit from ranging too far from the coop. So the plan is to open the coop in the early afternoon when it's warmer.

In blue, 4 county area with us in the middle
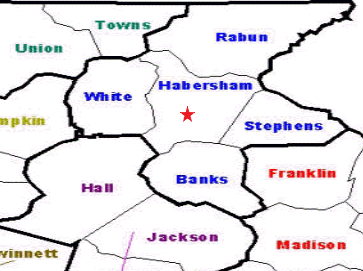
So now what? The next step is to order one more 15 lot of Assorted Rainbow Hens from Myers Hatchery. That should give Mel enough eggs, starting this summer, to start selling fresh chicken eggs in a four county area. After that, she'll start her regular chicken farm business with birds and hatching eggs to sell. I might mention that none of the driving distance to the farthest edges of each county is more than 30-45 minute driving distance from home. That's also added into the egg price. She's picked a central location in each county to deliver the eggs to. The customers will meet her on specific days and times to purchase the eggs. Yes, she even went so far to get permission to use the spot from the owners of the property. It's only common courtesy, right?

Off the hand and onto the perch.
She is also going to set up a tent at the county's chemical-free farmers market each Saturday from 8-12. She'll be selling eggs and homestead crafts. We don't yet have a tent, but we do have a patio umbrella and chairs. We have a small, fold up table for crafts and plenty of scrap material to make a table covering with for this season. The coolers with the eggs can be house inside the vehicle to maintain the required coolness of the eggs. Yes, Mel has taken the required egg selling course and is certified to sell eggs. This is required and regulated by the state of Georgia. Although the farmers market is only open until September, she should be able to garner more customers for year around delivery of her products. That's the plan anyhow.

Meanwhile, we'll hit Tractor Supply up during their Chick Days for her breed specialty large pens in lots of 25 chicks each. The shipping is too much from the hatchery. Of course, these are sold in only straight run birds.  All extra roosters will be culled for homestead use this year. It will be quite noisy around here with all those chicks in brooder boxes for four weeks. But we can handle it, we're pros at raising chicks.

Choosing breeds and training chicks...
from Meyers  Hatchery site
Of course, genetics play a part in training chicks. We usually choose breeds for friendliness, fairly docile, and great producers.  Even so, we tend to stay away from the white egg layers preferring brown eggs. It's not that white eggs have less nutritional values, but our customers want nonwhite eggs. To them, standard white eggs can be bought at any grocery store. Customers are willing to pay a premium for colored eggs. We want that market! Our eggs aren't cheap, but they have bright, orange yolks, our chickens are raised in luxury compared to large scale egg producers, and each one (no small task) is lavished with the best food and care. Happy chickens lay healthier, better eggs.

Into the coop you go.
We start training our chicks from the first day they enter our homestead. After the initial water, warmth, and food training, we handle each chick daily. At first, it's just putting our hand in the brooder box and talk to them to get them used to our voices. Over the next few days, each will be handled and brought to our eye level. We talk to them constantly at this point. We check for any illness, poopy butts, pasty butts, and their general health. Any health issues are attended to. We'll do this several times a day until every chick is done at least once. Believe me, it goes faster with less stress to the birds with two people doing this.

Each day, the chicks' tension and fear dissipates. The more adventurous chicks will even run up to your hand when it's introduced into the brooder box. Within a week, they will try to perch on your fingers. It's a lot less stressful for you and them when they do this. Eventually, the whole brood will be fighting for position as soon as the lid
Moving day for you my dear!
comes up to be the first. At this point, you have them trained for life to be people friendly. They trust you not to hurt them so they are more relaxed about being handled. Within a matter of a few weeks, you are firmly imprinted on their minds as care givers to them. It's sort of like raising children, only much quicker.

We'll do the same for any chick or critter on the homestead even adopted ones. And yes, quail are still in the mix too.  Somewhere between the second purchase of hens and the TSC Chick Days we'll have quail eggs in the incubator. Being how small quail are, they can brood in a large tote. So that's the now "what's next" for Mel's chicken farm operation. Hopefully by 2021, she'll have her business producing its own self sustainable, steady income with room to expand farther.

Y'all have a blessed day!
Cockeyed Jo

Sunday, January 12, 2020

The Cockeyed Chicken Farm Begins! We Got Babies!!!


Awaiting chicks
The brooder box Mel built out of scrap lumber now sits behind the sofa. Made from 2x4s and sheeting boards, this thing is heavy! Mel had to dismantle it and carry it in pieces, and put it back together in place. When I asked her why she didn't split the 2x4s on the table saw, she said, "I dunno. I didn't think of it."

Instead of a heat lamp, we're using our heating pad once again. This time it's draped over an arched wire frame work. The chicks can go under it for warmth. We put a layer of pine shaving on the bottom of the box. It's easy enough to clean out with a whisk broom and bucket for the waste...it will all go into the compost pile.

 Mel ordered fifteen All Female Rainbow Chick Layers from Meyer's Hatchery last week and the variety assortment arrived on Tuesday. The ad said at least 5 different breeds of chickens and from the looks of the identifying leg tags, we've got 7-10 distinctly different breeds.

From Meyer's catalog
From the picture in the ad, they should be a colorful assortment. We decided not to free range these because some of them are considered rare breeds. We want to protect them. These are strictly egg layers. With so many varying breeds of chickens in one coop/run, it will be interesting to see what kind what kind of personalities and pecking order they establish. Up until now, we've only raised Rhode Island and New Hampshire Reds, and Buff Orpingtons. We'll raise all of them to be friendly to humans. Not necessarily children friendly 'cause we ain't got any rug rats around this homestead. Or, at least not at any given time.

Every day, these chicks are handled by Mel and I. We just can't help it. They are such cute, little puff balls right now. We'll talk to them and cuddle them. We are certainly imprinted in their little minds already. I expect they'll try and follow us all over the place if we let them. I can see it now, all of them squawking to be picked up and loved on every time we enter the chicken run just like Broody and Black Butt does now. Lord knows, the the decibel level of peeps of these chicks dropped once I put them under the heated section of the brooder or we snuggle them inside our flannel shirts.

From Meyer's catalog
I'm personally looking forward to spring and having our own, fresh eggs again. Broody and Black Butt have stopped laying eggs. For Broody, I think it's age. She is in her 4th year. Black Butt stopped laying in the nest box with the Kassity killing Baby Girl. It could be a winter thing too.  I may put a nesting tote in the bunny/chicken barn. So we've actually had to start buying eggs from the store for homestead use!  I can surely tell the difference between our eggs and store bought ones. The yolks are yellow instead of orange and the whites are runny in comparison. There's a difference in taste and cooking/baking results too. Our homestead eggs were superior. Hopefully these new chicks will start laying by June for abundance of eggs to have and sell. Plus eggs from the other birds.


The quail pens are built and awaiting quail. Next livestock auction, I'll be buying some full grown quail and buying some fertile quail eggs to incubate. So our poultry farm begins. I'll have to revamp this design to add some quail and change it to "poultry farm." I still need to clean up the design some. Or, maybe I'll leave it alone for now.

Y'all have a blessed day!
Cockeyed Jo

Sunday, December 22, 2019

Quail Hutches and Chicken Coops/Run Plans

For the past couple of weeks, Mel has been a busy beaver with the SketchUp program. It's been cold and rainy so instead of trying to work on projects, she's been fine tuning the designs for the quail hutches and the designs for her chicken farm coops. She's also been searching the internet for designs (mostly YouTube) for this and that to make care of these new Cockeyed Critters easier on us. We ain't getting any younger, but maybe a little bit smarter.😉 She tweaked her original designs to incorporate these new elements we liked. I pulled her thumb drive with the pictures to be able to share them with y'all. So you get the first peek!

First up, (because I can 😁) is the new quail set up. We decided to sell extra birds (various stages of life) and the eggs too for eating and hatching. Why not have our efforts pay for themselves like every other critter on our homestead, right?

From our research we decided all hutches would have the following:
  • Utilize/reuse our oil drip pans from the rabbit hutches for the quail for their droppings.
  • Recycle all 99.9% of rabbit hutches for this project, we might need some new screw or staples.
  • ALL cages will have a gravity fed, automatic water system, and bulk feeders. We have leftover cups, PVC and fittings from other projects. Our bulk "J" feeders from the rabbits will work for the quail.
  • Dust bathes areas will use sand (leftover from gardening), wood ash from our wood stove, and the extra plastic shoe boxes from our fodder operation will find a new purpose in this. 
  • The extra floor tiles from the rabbit cages will be used to allow the birds to get off the wire bottom and serve as the base of the cardboard hide spots. 
  • One corner of each cage will have a "wild" area of branches, leaves, and a straw bed for the birds' enjoyment.
  • Although each cage has the room for 100 birds, a max number of quail per cage will be 50. 
  • To deter rats, snakes and other predators, 5 sides will be 1/2" x 1/2" welded wire. The 6th side is painted plywood. We decided not to slant the floor and configure roll out egg catchers for the very same reason. We configured the doors large enough so that I reach in to grab birds and/or eggs left-handed.
  • Instead of wood cross pieces to support the cage floor and litter tray, PVC will be used for easier clean up. 
  • Each set of hutches will have an 18-gallon tote underneath it with a 8'x6' tarp for inclimate weather, and at least 10 lbs of food at all times. 
  • Each hutch will have a salvaged metal roof for added protection from the weather.
Now onto the pictures!
Breeder cages


Brooder/Grow-out/Harvest or Sale Cages

 THE PLAN

The Breeder hutch will house the quail that we'll get our eggs from. They will be eaten, sold as eggs, or sold as fertilized eggs, or incubated for additional stock. It has four cages for abundant supply for each. Although, the first  100 eggs will be incubated for more breeding stock and a start on our own food needs. We'll allow the two weeks of eggs to be eaten or sold to give the males a chance to figure out what's what before incubating the egg harvest. with a ratio of 3 hens to one rooster, the odds of having fertile eggs is greater. Each cage will house 5 roosters and 15 hens even though the cage will hold 40. Who wants to live in a crowded house for two years? We'll be on the look out for excessive fighting and abuse during the first few weeks while they establish their own pecking order. Offender and severely abused quail will be eaten.😈 I will be holding one of the four breeding cages open for suitable replacement birds. These will be the largest birds by full grown weight not on the breeding cages by the same ratio.

The Brooder/Grow-out/Harvest or Sale Hutch will house quail chicks from 4 weeks old to maturity at 6-7 weeks old and serve as holding pen for quail harvest or sale. The plans call for two to be built upon a successful 6 month run of sales of eggs and birds. If the demand market is low, then only one is necessary for homestead needs. The cost of the second cage will be from profits of the business. Quails will be sorted and sexed at 6 weeks old.
  • The top cage will have a light, if necessary, for heat and can be closed in on two sides by hanging tarp pieces. (salvaged from large ripped tarp with new sewn edges)
  • The middle cage is strictly a grow out cage until the quail reach maturity or harvest weight of at least 8-10 ozs.
  • The lowest cage will house extra roosters and hens ready for harvest or sale. These will be 8-12 weeks old. 
Now, onto the chicken.
Cockeyed bunny/chicken barn
Two of our older birds, Miss Greedy Piggy and Goldie (two-year old hens) will be gifted to our local librarian who wants them. She bought a dozen eggs from us every two weeks.We are keeping Broody and Black Butt who are proven to go broody and are good mothers for our homestead flock. They will continue to roost and stay in the bunny/ chicken barn.

They will eventually be joined by a dozen assorted egg layers for homestead egg  and egg sales. These birds will free range. The five chicken we hatched out will be in the bunny/chicken hoop barn with Broody and Black Butt when they reach an appropriate size to introduce them. They'll be our free ranging stock.The five chicken we hatched out will be in the bunny/chicken hoop barn with Broody and Black Butt when they reach an appropriate size to introduce them. A chicken door will be added to lead out to the homestead. We do love our chicken integrating themselves in our daily activities as you can tell from our videos. Eventually, this will be our designated brooding or Americana chicken area. We haven't decided yet.

The first coop and run was built to overwinter our free ranging chicken. It is now vacant and needs some TLC which it will receive.  For the second, new coop and run, we are taking advantage of a past building project, the hoop greenhouse. Though not as big as the bunny/chicken hoop barn, it'll serve its purpose as a grow out area for chicken until they can join their larger companions in the big runs and coops. Since we only have two rabbits now, they'll only require one quarter of their 12'x 26' bunny/ chicken barn for them and all their needs (grooming station, feed, hay, and romp area). That leaves the rest of the space for Broody, Black Butt and whomever we put in there with them.

This is the design Mel came up with for utilizing these hoop barns for chickens. The coop will be built inside of the enclosure with a small run within. When the chickens get bigger and need more space and run will be built off the greenhouse conversion. Notice the small chicken door inside the human door. This will lead to the run area.

The old greenhouse set up will be strictly grow outs. We can add a heat light if the need arises. Mel is thinking about getting her first set of 25 chickens next month and the second set of 25 in March for her initial start up for her farm. By the time the first set of 25 starts laying eggs, the second set can be moved in with them. This will populate the first orchard pen. We'll start buying lots of 25 chicks every year after that too keep the interbreeding mix low for healthier chicks. Meanwhile, we can hatch out our own eggs too to grow her business. Financially, purchasing twenty-five chicks in rotation is a lot more feasible than fifty.

Now for the chicks we hatch out ,be they quail or chickens, Mel designed brooder boxes for them. They are 1 1/2' x 4' x 2' each. They are made from scrap pallet lumber and leftover bits and pieces Mel has in her shop. A lamp can clip on this and still have space to put feeders and waterers. They are small enough for easy clean outs, but big enough to house the birds until they feather out and can be moved to the grow out houses. She can build multiples and they are small enough to fit behind the sofa or anywhere really.

Now Mel has also designed the chicken coop to go into the orchard too! This 8' x 12' x 8' building will be on every other row because it also has storage space built in. Each downward roof angle will be guttered into a gravity fed automatic watering system to service two coops and runs. In the storage area there will be allotted space to gather eggs, stores food, scratch, tools needed to tend the coop and run areas, and straw to clean out two coop areas. It also allows for the tender to get out of the weather which is always a plus. By building two, it cuts our weekly/monthly in half with less wear and tear on our older bodies. We are being kinder to our bodies, instead of traipsing up and down a quarter acre worth of terraces carrying implements, feed, and bales of straw as we work towards raising healthy chickens and eggs.

We are looking to work smarter not harder. This way our yard tractor and cart can move the debris to the compost heap at the end of each run. It can also transport finished compost to where we want it. We'll build a two-stage compost bins out of pallets for the end of each run. I never quite saw the sense in a three compartment system.The beautiful part of this plan is that the building and operating costs of this venture (besides the initial investment) pays for itself and pays it forward as it expands. Each chicken coop and run will house 50 birds for a total of four units. We won't put the big chicken/egg companies out of business, but Mel can earn a nice income from it.

Y'all have a blessed day!
Cockeyed Jo

Sunday, October 20, 2019

The Great Chicken Experiment or ...

Mel's latest money making venture. Namely, becoming a chicken farmer. Her plan includes selling chicks, pullets, cockerels, layers, roosters, and eggs. She has narrowed the breeds to two with a possible third: Americana and Rhode Island Reds with Buff Orpingtons as a possible third.

We are well versed in the hatching, raising, and caring for two of these breeds. Currently owning Buff Orpington and Rhode Island Reds, we have learned their personalities and manners. We love both of these breeds and highly recommend both breeds for southern homesteaders. Both of these are dual purpose (meat & eggs) breeds with cream to brown, large eggs. They are prolific egg layers.

The new kid on the block will be the Americana breed. They are a cross breed of Ameraucana and Araucana breed chicken. As a novelty egg layer, hens lay colored eggs between olive green, blue, and turquoise eggs. The layers are less robust than the orpingtons and the reds, but about 240, medium sized eggs a year. Just think, no chemically dyed Easter eggs for Easter!

We may be adding some Silkies are mother hens since they have a great reputation for broodiness and mothers. We'd much rather raise chicks the way Mother Nature intended. While Rhode Island Reds RIR) are not known for broodiness, our Black Butt has turned out to be an excellent mother just as Broody. aka Gimpy, was to her last brood of New Hampshire Red chicks. I'm holding out for Goldie, our remaining Buff hen, to go broody. That breed is supposed to be broody, but she hasn't yet at two years old.

So we are getting a jump start on hatching some chicks of our own with our cockeyed incubator. (Instruction below)Yes, we know it's late October, but we're just in an experimenting stage. These eggs we've gathered from our free range birds could have been fertilized by Big Red (RIR) or Hoo-de-ho, our Buff rooster, or not fertilized at all. We'll have to wait and see.

In the meantime, we set up the our cockeyed incubator today. Now we have a standard electric incubator, but we've had better hatch rate this way. We've managed only a 75% hatch rate with the electric incubator with ours Mel managed 6 chicks from 6 eggs. (it may have been beginner's luck too.)  In case you can't figure it out, that's 100% hatch rate.

So, do you want to know how we did it? This time I took pictures while Mel set it up.

Our Cockeyed Incubator
(it was copied from similar models on YouTube)

What you'll need
An 18-gallon tote
A heating pad (ours has three settings low, high, and off)
Several beach towels
A small bowl
A sponge
Light fixture with 100-watt bulb, we use our brooder box light
A temperature probe (mine was one I used as a chef)
A pencil
Unrefrigerated eggs, 1 week or less old

Putting it together
Step 1
We laid a heating pad on a folded  a beach towel fold it into quarters. We
turned the heating pad on high. Our heating pad is an older model that does not cycle off when the temperature has been on too long.


STEP 2

We folded another towel and placed it inside the container. This gave the eggs a comfortable cushion with a cotton pillowcase for the eggs and to stabilize them. We can bunch up the pillowcase easier than the towel to keep the eggs in position.


STEP 3
Next we placed a thermometer in the tote and the 100 watt bulb in the tote.Notice we have not punched any holes in the tote. We can reuse this tote for a large optional storage solutions later after cleaning it with bleach, soap and hot water.

STEP 4
We placed a small bowl and a sponge in the corner away from the eggs but still on the heating pad.We poured boiling hot water over the sponge  Enough to soak the sponge and leave 1/2" in the bowl. You'll maintain this until hatching is complete.

STEP 5
Check your eggs carefully. If one appear abnormally large, it's probably a double yolked egg. (Miss Greedy Piggy is notorious for giving one of these a week). It may not hatch or develop twins. Not a good choice for hatching, but wonderful for baking with. Some eggs may have tiny cracks or a hole in the shell. These are also good candidates for hatching. Heavily soiled eggs (feces or dirt) also should not be incubated also. Have them for breakfast instead. Two of our "to be hatched" fell into this category so we are hatching 9 instead of 12.

STEP 6
Take each egg an draw an "O" on one side and an "X" on the other with a pencil. I know some people who do this with a marker, but I have concerns of the chemicals leaching through the porous shell. Do you know what chemicals or dyes are in a Sharpie marker, I don't either so I don't want it anywhere near my chicks.

We'll place the marked eggs  onto the towel "O" side up.


STEP 7
We will be manually turning these eggs  four times a day until day 17. The "X"s and "O"s will tell us it has been done without yelling at each other to ask. We start at "O"s and the evening it's "X"s. Then we'll start again at "O"s again in the morning.

When we open the box to turn them, we lose all that lovely humidity and warmth the eggs need so we'll pour some hot, steamy water into the bowl before we close the lid again. Each morning turn, we'll empty the bowl, squeeze the sponge, and add fresh boiled water again to the bowl.

STEP 8
Place the container lid on the container. To regulate the temperature, simply open the lid part way if it's too warm. If more heat is needed, cover the whole tote with a blanket. Remember to plug the cords into a power strip and make sure it works. Do not add your eggs until you reach 99 degrees in the tote. It will do so in a few hours. We do a standard 12 hours and check it frequently.

We will candle these eggs when we stop rotating them. We will discard any unfertilized eggs. It's doubtful with two roosters doing their rooster business on the so few egg layers, but it can happen, right?

***************
With our nighttime lows dipping into the low 50s, we cover them at night too to help maintain the temperature overnight. We don't have CH/A, but it's too warm to start a fire in the wood stove so we do what we can to compensate. Mel has hatched chicks twice now with 100% hatch rate. The first time in February 2014, she chocked it up to beginner's luck, but a second time  in 2016 was more than beginner's luck.

If the chicks that hatch and survive fall into the RIR/Buff category, the hens will go into the household use (personal use or eggs for sale). Otherwise, (especially cockerels) it's the canner pot for them when they reach harvest age and weight. The true RIR are born, they'll be separated to start Mel's egg farm operation.

That's the plan anyhow. But you know what they say about don't count your chickens before they hatch. Projected hatch date is November 5th or there about. Wish us luck.

Now, in the meantime, I've been researching Pharaoh quails.  Since Mel and I are are dark meat fans, it only makes sense, right? They are all dark meat and easy for me to care for and be  harvest by me alone. We also have unused rabbit hutches outdoors. I'd only have to redo the hardware cloth, but we have to redo it that anyhow if we move the rabbits outside and we have enough hutches for ten rabbits which we have two. We lost Alby and Moira this week.😥

Mel's on the fence about this. If there's a market for chickens and eggs wouldn't there also be a market for quail? Of course, they wouldn't be free range nor "organic." But, they would be antibiotic free. I imagine I could come up with a seed and grain mixture like I supplement the chickens free range feedings with during winter. Still researching options on this. I can fit a whole lot of quail in two 37" x 29" rabbit cages (5.5 sq ft) plus the surplus rabbit cages we have. I'm just saying, waste not, want not.

Y'all have a blessed day!
Cockeyed Jo